Archives

Raspberry White Chocolate Chip Blondies

The Archaeologist Bakes - Raspberry White Chocolate Chip Blondies

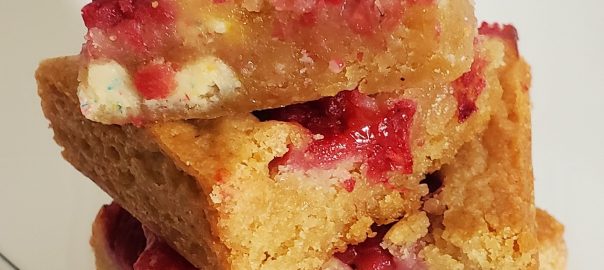
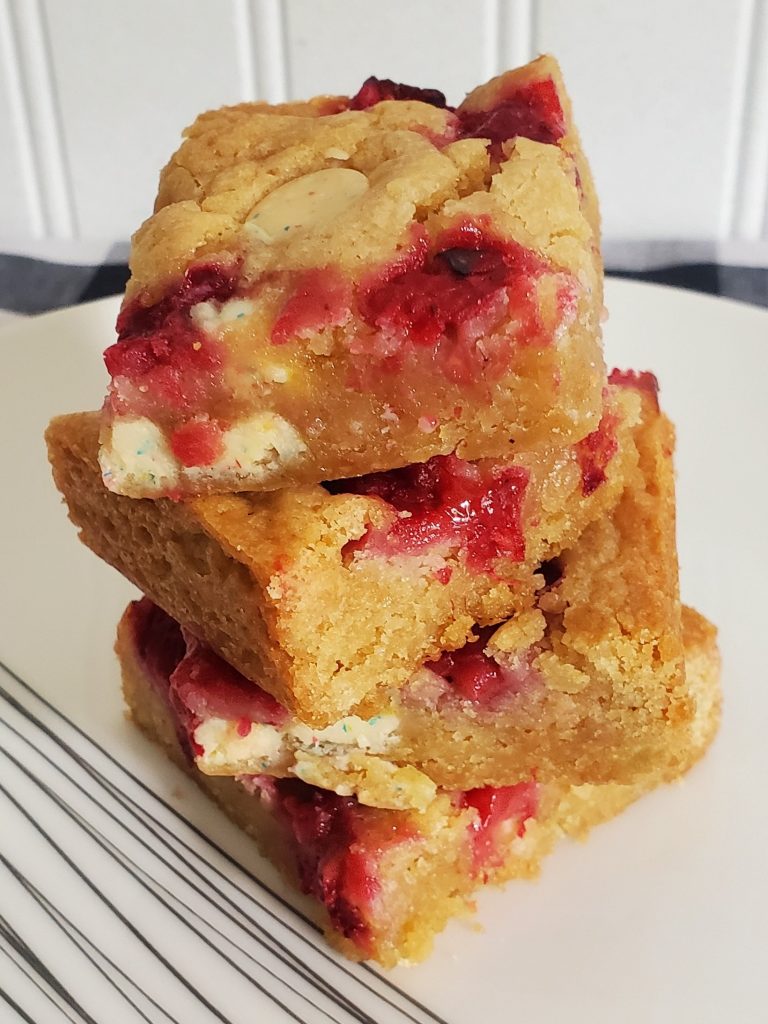
I love a good brownie as much as anyone, but especially this time of year it’s nice to mix it up with something that tastes a little lighter, like these blondies! Full of raspberries and white chocolate chips, they are also buttery and chewy and really the perfect type of blondie. And while I said they taste lighter because of the raspberry and white chocolate, trust me, they are still extremely decadent.

I’ve been making version of these blondies for years, but I’ve never shared them here. Now is the time. I admit that blondies aren’t my favorite dessert, and I’m really not a fan of white chocolate. But these blondies are just so rich and fudgy, while the raspberry really pops and the white chocolate seems to round it all out. Every time I make these I wonder why I don’t make them more often.

The Archaeologist Bakes - Raspberry White Chocolate Chip Blondies

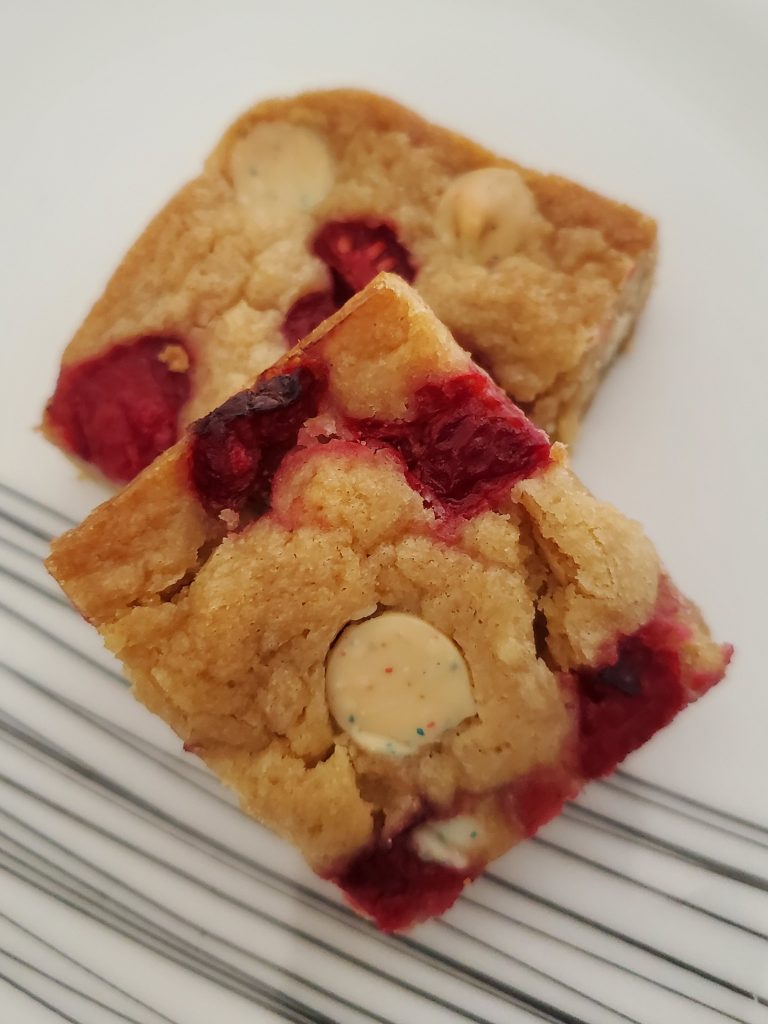
I frequently add slivered almonds to these. Sometimes in addition to the white chocolate chips, and sometimes instead of them. But there are endless ways to customize them. As always, you can add any nut you want, or substitute any flavor chip you would like (bonus points if you use the confetti white chocolate chips like I did). Regular, old semi-sweet chocolate chips would be fantastic. Blackberries, strawberries, and blueberries would all work well. Or use a mix of whatever you have! You can also always leave out the almond extract. The zest of half a lemon would be a great addition instead!

The Archaeologist Bakes - Raspberry White Chocolate Chip Blondies

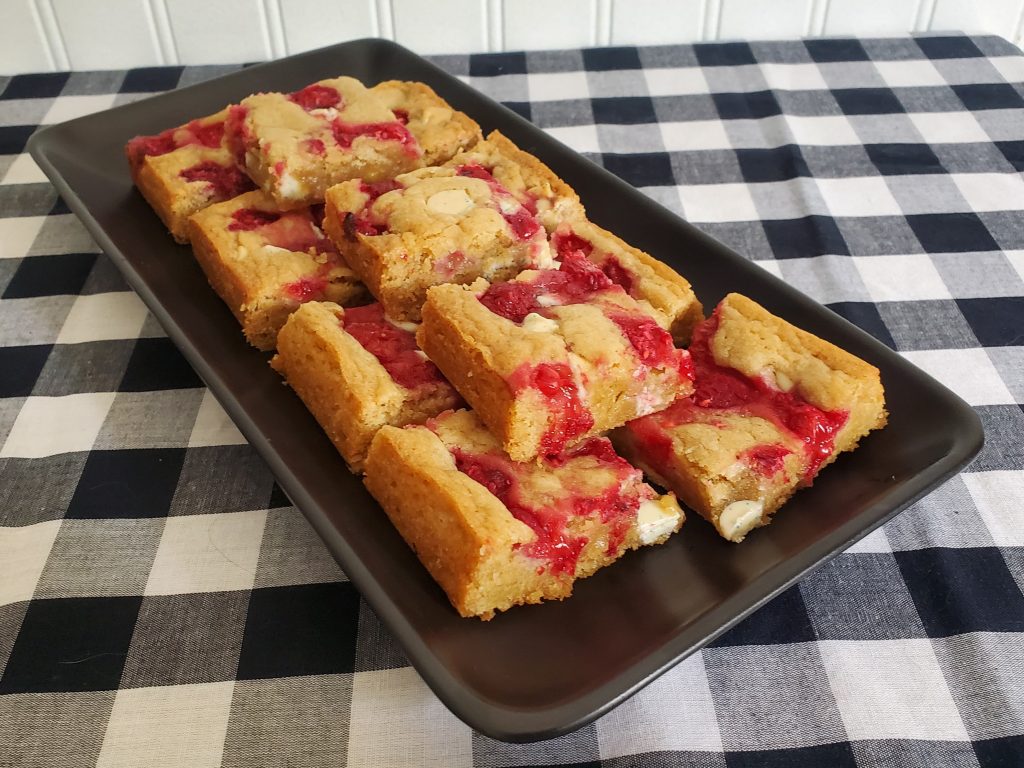
Don’t do what I do and wait too long to make these. They are so perfect for spring, when you’re craving fresh berry flavors, but it still gets cool at night so a decadent dessert sounds good. Make them this weekend (and then maybe next weekend too)!

Print Recipe
Raspberry White Chocolate Chip Blondies
Course Dessert
Servings
Ingredients
Course Dessert
Servings
Ingredients
Instructions
  1. Line an 8-inch square pan with parchment paper or aluminum foil and spray with non-stick cooking spray.
  2. Combine melted butter and brown sugar. Stir in egg, vanilla, and almond extract.
  3. Stir in flour, baking powder, and salt.
  4. Add white chocolate chips, mix well, and scrape into prepared pan. Smooth the top.
  5. Slightly chop the berries. Scatter them over the batter in the pan.
  6. Bake at 350 degrees F for 35-45 minutes. Blondies should be golden brown and set in the center. A toothpick inserted near the center should come out with only a few wet crumbs.
  7. Cool completely before removing from pan and slicing.
Recipe Notes
  • Leave out almond extract, or substitute with the zest of half a lemon.
  • Use semi-sweet or other chocolate chips instead of white chocolate.
  • Use up to 1 cup of mix-ins. Instead of all chocolate chips, use 1/2 cups nuts and 1/2 cup chips.
  • Try different berries - strawberries, blackberries, and blueberries would all be great.
Share this Recipe

Black and White Banana Cupcakes

I have the perfect Fourth of July recipe for you today! It’s a delicious banana cupcake dipped in chocolate and vanilla fudge frostings. It’s a great dessert to bring to a cookout for several reasons. First, the recipe makes 24 cupcakes, so there’s plenty to go around. Second, the frostings set up firm so they’re easy to transport and they won’t melt easily in the heat if you’ve got them sitting outside. And finally, well, they’re just plain delicious!

These cupcakes are one of my favorites. Well, let me clarify. The cupcakes are delicious. The frostings are out of this world, and probably the reason I like the cupcakes so much. I am a chocolate person through and through. I never choose vanilla if chocolate is an option. Except with this frosting. This vanilla frosting is almost like a vanilla fudge. It is so good, it will almost make you forget there is chocolate available too. Almost. So, I could never choose between a vanilla frosted and chocolate frosted one. Until now. I figured if New York could frost their cookies with both vanilla and chocolate, well, I could do it to my cupcakes. Yep, it’s a good idea.

Let’s start by talking about the cupcakes. Really, these aren’t much different than banana bread. They’re a little bit lighter in texture, which is perfect for a summer cupcake. The banana flavor is there but not overwhelming, and the bananas help to keep the cupcakes moist. Nuts are completely optional, but I do enjoy walnuts or pecans in these. I think hazelnuts or macadamias would also be great. Or, if you prefer to throw in some mini chocolate chips, I won’t stop you. They’re your cupcakes – do what sounds good to you!

Now, the frostings. Yes, plural. But I promise they aren’t difficult. Both are rich and fudgy, and they both go so well with the banana cupcake. To frost them, if you only want one flavor on the cupcake, you can just dip the tops into the warm frosting. To get the half and half look, I found it easier to use a spoon or spatula to spread partially cooled frosting on half a cupcake and then repeat on the other half with the other flavor. If you want sprinkles (and who doesn’t want sprinkles?), you need to be fast with them. This frosting sets fairly quickly, so I wouldn’t frost more than one or two cupcakes before topping with sprinkles. It’s a great task for any little helpers you have!

Each frosting recipe makes enough to fully frost 12 cupcakes, so one recipe of each flavor will cover 24, either 12 of each or half and half on 24. Of course, if you don’t need to transport these or want to change them up, you can absolutely use a standard buttercream. Chocolate, vanilla…..peanut butter, anyone? And you could replace the sprinkles with chopped nuts, mini chocolate chips, or chopped candies. 

These cupcakes are sure to become a favorite. Bake up a batch for your next picnic or bake sale. And if you have leftovers, well, they’re basically banana bread…so I say eat them for breakfast!


Print Recipe


Black and White Banana Cupcakes

A light banana cupcake with chocolate and vanilla fudge frostings.

Course Dessert

Servings
cupcakes


Ingredients
Cupcakes

Chocolate Frosting

Vanilla Frosting

Course Dessert

Servings
cupcakes


Ingredients
Cupcakes

Chocolate Frosting

Vanilla Frosting


Instructions
Cupcakes
  1. Cream butter and sugar. Add eggs and vanilla and mix well,

  2. Stir in mashed bananas.

  3. Combine dry ingredients, except nuts. in a separate bowl.

  4. Add half of dry ingredients to banana mixture, mix, and add sour milk. Mix well and add remainder of dry ingredients.

  5. Stir in nuts if using.

  6. Line 24 muffin cups with paper liners and fill about 2/3 full.

  7. Bake at 350 degrees F for 20-25 minutes until golden brown and the centers spring back when touched.

  8. Remove cupcakes to wire racks to cool.

Chocolate Frosting
  1. Combine chocolate, butter, and milk in the top of a double boiler and heat until melted.

  2. Turn off heat, but leave the double boiler together. Stir in powdered sugar. Frosting should be thick but pourable.

Vanilla Frosting
  1. Combine butter, milk, and salt in the top of a double boiler and heat until melted.

  2. Turn off heat but leave double boiler together. Stir in vanilla extract and powdered sugar. Frosting should be thick but pourable.

Assembly
  1. While frosting is still pourable, dip the tops of the cupcakes and allow to set on wire racks.

  2. To create half and half cupcakes, let frosting cool slightly and spread cupcakes half with vanilla and half with chocolate frosting.

  3. Frosting sets quickly, so add sprinkles after every one or two cupcakes are frosted.

  4. If frosting begins to cool and set in the bowl, you can reheat gently in the double boiler.


Recipe Notes

Make these your own:

  • Choose your favorite nut to add.
  • Leave out the nuts entirely.
  • Substitute mini chocolate chips instead of nuts.
  • Not in love with chocolate? Double the batch of vanilla frosting and use only that.
  • Family of chocoholics? Double the chocolate frosting and use only that.
  • Instead of sprinkles, use nuts, mini chips, or chopped candies.
  • You can use any flavor of buttercream on these as well - chocolate, vanilla, and peanut butter would be great!


Share this Recipe

Ice Cream Slab Pie

Who’s ready for ice cream? Or better yet, ice cream slab pie! This one has a rice crispy crust, peanut butter fudge sauce, and homemade no-churn ice cream with chocolate chips and peanut butter cups. It’s a twist on a favorite dessert my mom used to make in the summertime.

It sounds like a lot of components, but each of them are so easy. And there are so many options – not only to change up the flavors, but you can easily swap in store-bought parts too. You can make this as homemade or store-bought as you’d like.

Let’s start with the base. My recipe begins with a simple rice crispy base. But you could just as easily bake up a batch of brownies, or use a roll of cookie dough pressed into a pan and baked. Even a graham cracker crust would work.

The sauce starts with a homemade hot fudge that is combined with peanut butter. You could leave out the peanut butter and extra corn syrup (just use the whole batch of hot fudge instead). Or start with a bottled hot fudge sauce. You can also mix up the flavors. Use a caramel or butterscotch sauce instead. Or use a different nut butter, Nutella, or even cookie butter!

The ice cream is a very simple no churn ice cream. I love the no-churn recipe, and it’s endlessly adaptable. Choose the candy mix-ins that you prefer, or use crushed cookies (like Oreo’s!). You could also use a store-bought ice cream in whatever flavor you prefer. Just soften it slightly before you scoop it into the crust.

There are so many variations you can make to this recipe. I hope you give it a try, and let me know what flavors you choose!


Print Recipe
Ice Cream Slab Pie
Course Dessert
Servings
Ingredients
Base
Hot Fudge Sauce
Ice Cream
Course Dessert
Servings
Ingredients
Base
Hot Fudge Sauce
Ice Cream
Instructions
Base
  1. Combine first three ingredients in a large saucepan and bring to a boil over medium heat.
  2. Remove from heat and stir in cereal until completely coated.
  3. Press evenly into a greased 13"x9" baking pan. Line with parchment or waxed paper if preferred for easier serving.
Sauce
  1. Melt chocolate in a small saucepan over low heat.
  2. Once melted, add evaporated milk, sugar, cocoa powder, 1/4 cup corn syrup, salt, and vanilla. Cook over medium-low heat until thickened, about 5 to 8 minutes. The mixture should not quite come to a simmer.
  3. Remove 2/3 cup hot fudge sauce and combine with peanut butter and remaining corn syrup. Save remaining hot fudge sauce for another use (store air tight in refrigerator).
  4. Spread half of peanut butter fudge sauce onto the base and place in freezer.
Ice Cream
  1. Whip cream until soft peaks form.
  2. Gently fold in sweetened condensed milk and vanilla until combined.
  3. Chop 12 of the peanut butter cups and fold into ice cream mixture with all but 2 tablespoons of the chocolate chips.
  4. Spread ice cream mixture onto prepared base and sprinkle with remaining chips and the other 6 peanut butter cups, chopped.
  5. Freeze for at least 6 hours or overnight.
  6. Serve with warmed remaining peanut butter fudge sauce drizzled over each serving.
  7. Store leftovers in the freezer, and extra sauce in the refrigerator.
Recipe Notes
  • Use any crust you'd like - brownies, baked cookie dough, graham cracker crust.  Mix it up with different flavors!
  • Use 2/3 cup bottled hot fudge sauce if desired. Or double the amount and leave out the peanut butter.
  • Use any flavor sauce you'd like - try butterscotch or caramel!
  • Substitute any nut butter, or even Nutella. Cookie butter would be delicious too.
  • Use any mix-ins you prefer - try different candies, or crushed cookies. Your imagination is the limit! Use 1 to 2 cups total.
  • You can also use softened, store bought ice cream in any flavor to fill the crust (6 cups/ 48 oz tub).
Share this Recipe

Mud Pie for Grandpa

I am a long-time collector of recipes. Cookbooks, magazines, recipe cards – I love them all. For years I copied or clipped recipes from all of the above, and I keep them in a set of binders. More recipes than I’ll ever get around to making. As I was looking through those binders looking for inspiration, I came across an old recipe for Mud Pie. It came out of a children’s cookbook, Alpha Bakery by Gold Medal Flour.

Sometime in roughly the mid-90’s, I made this recipe for a family dinner. I don’t remember the exact occasion, but my grandparents, and maybe others, had come to dinner. Anyway, I made the mud pie and we all thought it was delicious. Several months or maybe even a year later, my grandfather asked about the dessert. He wanted me to make it again. He described it as a brownie or cake with whipped cream on it. Well, neither my mom nor I, or anyone else, could remember such a recipe. (I know – that really makes you want to try a recipe we couldn’t remember a relatively short time later.) He continued to talk about it on occasion, and how much he liked it. But we just could not figure out what that recipe was.

My grandpa passed away in 2006, and I still hadn’t figured out what dessert he was remembering. Fast forward several years, when my parents were moving into their current house and I was helping them to pack up. I was looking through all of my mom’s cookbooks while packing them when I came across the Alpha Bakery cookbook. I flipped through it to see if there were any recipes worth saving, and as soon as I saw the Mud Pie recipe I knew that was recipe Grandpa kept asking about. I copied it then and put it into my binder, to be forgotten again until this past weekend. Since his 95th birthday would have been later this week, I knew it was time to make it again.

The base is a rich brownie with chopped nuts. I used slivered almonds because I had some on hand. But you can of course use the nuts of your choice, or leave them out. Replace them with chocolate chips (any flavor) if you’d like. You top the brownie with hot fudge sauce. I used a homemade sauce, but you can definitely use a jarred sauce – fudge sauce, not chocolate syrup. I also think this would be delicious with a caramel sauce instead. Then top it all with whipped cream. I used a stabilized whipped cream, since I knew we wouldn’t eat it all at once. You could use regular whipped cream if you have enough people to serve that there won’t be leftovers. Or Cool Whip works too. But if you are making your own whipped cream, consider playing around with the flavors. Personally, I think a little almond extract in it would be perfect. But strawberry or cherry extract and a little red or pink food coloring would be delicious. Or peppermint extract and green food color for a grasshopper type of pie. The possibilities are endless.

Happy Birthday Grandpa!

Print Recipe
Mud Pie
A dense, fudgy brownie topped with hot fudge sauce and whipped cream. Lightly adapted from Gold Medal Flour's Alpha Bakery
Course Dessert
Servings
Ingredients
Brownie Base
Whipped Cream
Course Dessert
Servings
Ingredients
Brownie Base
Whipped Cream
Instructions
Brownie Base
  1. Heat oven to 325 degrees F and grease an 8-inch cake pan or pie plate.
  2. Mix butter, sugar, eggs, vanilla, and salt in a medium bowl.
  3. Stir in flour, cocoa powder, and nuts.
  4. Pour into prepared pan and bake for 25-35 minutes or until a toothpick inserted halfway between the center and the edge comes out clean. Time will depend partly on the size of your pan.
  5. As soon as the brownie comes out of the oven, poke it all over with a skewer or fork. Spread the fudge sauce over the brownie and let cool completely.
Whipped Cream
  1. For stabilized whipped cream, combine gelatin and water in a small saucepan and let sit until thick.
  2. Melt gelatin over low heat, stirring constantly. Once melted, remove from heat and cool slightly.
  3. While gelatin cools, whip cream and powdered sugar until soft peaks form. Add vanilla. (At this point, for regular whipped cream, whip a little longer until stiff peaks and use immediately.)
  4. Beating slowly, gradually add the cooled gelatin mixture to the whipped cream. It will start to look a little curdled, but beat at low to medium speed just until combine and peaks are stiff.
  5. Spread or pipe onto cooled brownie base.
  6. Serve with shaved chocolate or additional hot fudge sauce.
  7. Store in refrigerator.
Recipe Notes
  • Use any nuts you like, or substitute with any flavor of chocolate chips.
  • Jarred or homemade hot fudge sauce works great. Experiment with flavors. Try caramel sauce, or chocolate-mint fudge sauce instead.
  • Use Cool Whip in place of whipped cream.
  • Or flavor your whipped cream with any extract you like. Enhance with food color if desired. Think mint, strawberry, etc.
Share this Recipe

Zucchini Bread – Made with Spaghetti Squash!

Hi Everyone! I know I’ve been pretty absent here this summer, but I promise I am getting back to baking and will be bringing you lots of new recipes soon! I am so ready for fall – fall weather, fall flavors, fall color. It’s my favorite time of year. 🙂

But for those of you still clinging on to summer, and the bounty of your vegetable garden, I have one more summer recipe for you. Actually, with the cinnamon, it tastes like the start of fall, but it’s a great way to use up your squash.

This was originally my mom’s zucchini bread recipe, and people LOVE this bread. It’s got a nice strong cinnamon flavor and is super moist because of the zucchini. I was gifted a spaghetti  squash from a co-worker, and of course I was immediately challenged to bake something with it. I wondered if I could use it in place of zucchini in baked goods. So I did a little research, crossed my fingers, and went for it. 

This is the second recipe I’ve tried using that substitution, and I can’t tell the difference between the original and the spaghetti squash version. Yes – it works! The only difference is that you have to cook, and shred, the spaghetti squash first, whereas the zucchini is shredded and added to the batter raw. Also, you need to measure the squash by weight, since it is much more dense than shredded zucchini. 

Yes, you can absolutely use zucchini as originally intended. And while I used walnuts in mine, as always, the nuts are optional or changeable. Pecans are always delicious in sweet breads. Hazelnuts or macadamia nuts would be really interesting too.  This recipe uses only cinnamon, but you could change that up too. Add in a little bit of nutmeg or cloves for more of a fall flavor. And you can absolutely bake this in standard 8″x4″ loaf pans. I couldn’t resist trying out this beautiful new swirl pan I just got. And I have to say that I am loving it.

Serve this warm or at room temperature. Or toast it and spread on a little butter. Or cream cheese. Or, if you want to go all out, drizzle on some cream cheese icing for a decadent treat. I think I need to go make another batch of this and do just that….


Print Recipe
Zucchini Bread - with Spaghetti Squash!
Course Breakfast, Dessert
Servings
Loaves
Ingredients
Course Breakfast, Dessert
Servings
Loaves
Ingredients
Instructions
  1. Whisk eggs and sugar together until thick and very light yellow in color.
  2. Whisk in oil and vanilla until combined.
  3. Stir in shredded zucchini or squash.
  4. Combine dry ingredients and stir into batter along with nuts, if using, just until combined.
  5. Pour into two 8"x4" greased loaf pans.
  6. Bake at 325 degrees F for 60-70 minutes. (See notes).
  7. Cool 10 minutes before turning out onto a cooling rack to finish cooling. Serve warm or room temperature.
  8. Store in an airtight container for 2-3 days at room temperature or a week refrigerated.
Recipe Notes
  • Zucchini should be grated raw, with or without the peel.
  • Spaghetti squash should be cooked (steamed or baked) and shredded before adding to batter.
  • If you are using larger loaf pans (like the pan I used, or a 9"x5" pan) the bread will cook faster. Start checking after 35 minutes.
Share this Recipe

Coffee Chocolate Chip Oatmeal Cookies

I know what you’re thinking. You’re thinking you don’t need another chocolate chip cookie recipe. But you’re wrong. Because not only is this cookie delicious and different than most of your chocolate chip cookie recipes, this one doesn’t have to be a chocolate chip cookie.

This recipe is based off of a recipe we made all the time as kids. We always had homemade cookies in our school lunch. Always. (My mom is the best. 🙂 ). The oatmeal chocolate chips cookies were a regular and a favorite. I was thinking about them the other day, and I thought they might be improved with a bit of coffee. (I was right). I made a few other changes (took out one egg white, used all brown sugar, melted the butter) to make them even chewier. Also a good idea.

But as I said, these don’t have to be chocolate chip cookies. In fact, the original recipe called for either chocolate chips OR shredded coconut. You could absolutely make that substitution here. Or add chopped nuts. Or dried fruit (you know, like raisins, if you’re in to that kind of thing). Or any combination of the above. The coffee is not an overwhelming flavor, but it really does add an interesting element to the cookie. Yes, you can leave it out. Or, if you want a real coffee punch, use up to twice the amount I’ve called for.

One thing you shouldn’t do is skip the chilling the dough step. Especially when using the melted butter, you really need to chill the dough to get a thicker, chewy cookie. Unless you want a thinner, crispier cookie. In which case, you should bake these as soon as they are mixed. (But seriously, why would you want that??) Whatever way you make these, you should definitely make them soon. I was informed that these are “husband approved”, and that I didn’t need to bring these in to the office to share. (Sorry guys!) 🙂

Print Recipe
Coffee Chocolate Chip Oatmeal Cookies
Course Dessert
Servings
cookies
Ingredients
Course Dessert
Servings
cookies
Ingredients
Instructions
  1. Combine melted butter and brown sugar and mix well.
  2. Add egg, egg yolk, coffee (dissolved in water), and vanilla and mix until combined.
  3. Add dry ingredients, mixing just until combined.
  4. Stir in chocolate chips or other mix-ins.
  5. Refrigerate dough at least 30 minutes.
  6. Scoop chilled dough by heaping tablespoons onto cookie sheets.
  7. Bake at 350 degrees F for 12 to 15 minutes or until golden brown and just set. Do not overbake.
  8. Cool completely on wire rack. Store in airtight container up to a week.
Recipe Notes
  • Use any flavor chips you like.
  • Substitute chopped nuts, shredded coconut, and/or dried fruit.
  • Use any combination that sounds good to you!
Share this Recipe
 

Cherry Chocolate Chip No-Churn Ice Cream

Is it warm enough for ice cream where you live? It’s been warm off and on here, but the truth is we will eat ice cream all year long. 🙂

Do you remember the cherry curd I made? I mentioned at the time that you could swirl it into ice cream, and that’s exactly what I did with it! I have made a few no-churn ice creams over the years, and I have to say that I love them. I have an ice cream maker as well, and have made traditional ice cream too, but I really do love the simplicity and texture of the no-churn varieties.

It only takes a few ingredients for the base, and it is endlessly customizable. And there is no chill time, then churn time, then freezer time like traditional ice cream. You mix the ingredients together and stick it in the freezer for a few hours to harden. That’s it. Homemade ice cream in six hours or so. You really can’t beat that!

So the base starts with just a can of sweetened condensed milk and heavy cream. Whip the cream to firm peaks and fold it into the condensed milk. For vanilla ice cream, just add some vanilla extract or vanilla bean paste. Or go crazy with your add-ins. Choose any other extract that sounds good to you. Stir in nuts or chocolate pieces, or drizzle in fudge sauce or caramel. Or do like I did and fold in cherry, or any fruit, curd. You can stir in some cocoa powder to the sweetened condensed milk before adding the whipped cream. I made one that called for a melting peanut butter into the condensed milk before adding the whipped cream.

For this particular recipe, I folded about a cup of the cherry curd into the base along with about a half cup of mini chocolate chips. I prefer the mini chips in ice cream because they aren’t as hard to eat when frozen as a larger chip is. I stirred the curd almost completely into the base, but you can leave it as streaky as you’d like. Place the mix into a freezer-safe container, and add a drizzle of curd to the top. Cover tightly and freeze for four to six hours, or until the ice cream is hard.

This no-churn ice cream is so smooth and creamy, I really do prefer it to regular ice cream any more. And it’s so easy to make, there really is no excuse not to try it! 


Print Recipe
Cherry Chocolate Chip No-Churn Ice Cream
Course Dessert
Servings
Course Dessert
Servings
Instructions
  1. Beat the heavy cream with an electric mixer until firm peaks form.
  2. Fold the whipped cream into the condensed milk until almost fully combined.
  3. Fold in the cherry curd and chocolate chips until well distributed or fully incorporated, depending on your preference.
  4. Place into a freezer-safe container and freeze for 4 to 6 hours, or until ice cream is firm.
Recipe Notes

Variations:

Add 2 teaspoons of vanilla or any other extract to the sweetened condensed milk before folding in the whipped cream.

Stir in any nuts or candies of your choice (about 1 to 1 1/2 cups total) after folding in whipped cream.

Melt 2/3 cup peanut butter and mix into the condensed milk before folding in the whipped cream.

Add 1/2 to 3/4 cup cocoa powder to the condensed milk before folding in the whipped cream.

Share this Recipe

Mocha Irish Cream Cupcakes for St. Patrick’s Day

It snowed this morning!! We have had almost no snow this year, and actually hit 80 degrees last week, and I was missing winter. But I woke up this morning to big wet snowflakes! That has absolutely nothing to do with these cupcakes, but I was so excited I just had to share. 🙂  

Anyway, on to the cupcakes! Do you guys do anything special for St. Patrick’s Day? Do you attend a parade, or bake anything special? I’ve never really celebrated it much, but a few weeks ago I was in Michaels, mostly just browsing, but with my Cherry Chocolate Chip Rolls in mind. I was supposed to be looking for something Valentine’s Day related while I was walking down the baking aisle, and then I spotted these St. Patrick’s Day sprinkles.


I decided I had to have them, but then I had to figure out what to do with them. Cupcakes sounded like a good idea, but what kind? So I started searching Pinterest for St. Patrick’s Day ideas. It seems like Irish cream is pretty popular right now. And since Irish cream has a lot of the same flavors as mocha, I decided to incorporate in into a favorite mocha cake of mine. And make them cupcakes, because cupcakes are just more fun.

I thought it might be easier (and cheaper!) to use an Irish cream coffee creamer. Since I don’t drink coffee, I had never tried the creamer before. Before I started trying to add it to my cake recipe, I tried it straight. Oh my goodness, you guys, it is SWEET. So I knew immediately I would have to reduce the sugar in the recipe. Thankfully, it turned out perfectly on my first attempt, but I sure am glad I tried the creamer first!

To top the cupcakes, I figure I might as well go all the way and make an Irish Cream buttercream. It was a good idea. The cupcakes aren’t overly sweet, so a nice big swirl of buttercream compliments them nicely. And it gives the sprinkles a pretty place to land. 🙂

If you aren’t a fan of Irish cream, or coffee in general, you can make some adjustments to this recipe pretty easily. Try any flavor of creamer that sounds good to you. And if you are using a non-mocha flavoring you can leave the instant coffee out of both the cake and frosting. Amaretto would be fantastic (I LOVE chocolate and almond together!). You can amp up the flavor by adding a little bit of almond extract. Or what about the salted caramel mocha? I might add some salted caramel into the buttercream for that one. A peppermint or peppermint mocha version would be fantastic at Christmas! For now, I’m going to stick with the Irish cream, but I definitely have other ideas brewing! 😉


Print Recipe
Mocha Irish Cream Cupcakes
Adapted from the Mocha Coffee Cake at Health.com. http://www.health.com/health/recipe/0,,50400000112136,00.html
Course Dessert
Servings
cupcakes
Ingredients
Cupcakes
Course Dessert
Servings
cupcakes
Ingredients
Cupcakes
Instructions
Cupcakes
  1. Heat oven to 350 degrees F. Line 24 cupcake cups with liners and spray lightly with non-stick spray.
  2. Whisk together flour, baking powder, salt, and cocoa powder in a bowl and set aside.
  3. Dissolve instant coffee granules in the coffee creamer and set aside.
  4. Cream butter and sugar until very well combined, about 2 minutes.
  5. Add eggs, one at a time, beating well after each.
  6. Add the flour mixture in three batches, alternating with first the sour cream and then the creamer. Mix just until combined after each addition.
  7. Divide batter evenly between the cupcake tins, filling each about 3/4 full.
  8. Bake for 20 to 22 minutes, or until a toothpick inserted in the center of a cupcake comes out clean.
  9. Cool completely before frosting. Keep in an airtight container for up to a week.
Frosting
  1. Combine creamer and instant coffee. Set aside.
  2. Beat butter, shortening, and salt with an electric mixer on medium speed until well combined.
  3. Add half of the powdered sugar and beat until creamy. Add half of the creamer mixture and mix again.
  4. Add the remaining powdered sugar, followed by the remaining creamer mixture. Beat until combined.
  5. Turn mixture on high and beat for 5 minutes until light and fluffy. Add additional powdered sugar 1/4 cup at a time or creamer 1 tablespoon at a time to adjust consistency if necessary.
  6. Pipe or spread onto cooled cupcakes.
Recipe Notes

Buttercream makes enough to generously frost 24 cupcakes. If you prefer a smaller layer of frosting, cut recipe in half.

Substitute any flavor creamer for the Irish cream, eliminating the instant coffee granules if preferred. Enhance with extracts if desired. Almond in Amaretto, peppermint in peppermint mocha, etc.

Share this Recipe

Mardi Gras Cookies, and Let’s Talk about Archaeology

Hi everyone! I’ve been kind of under the weather this week, so I decided to make a pretty simple cookie. They take almost no time to put together, they are delicious, and you can totally customize the colors to suit any occasion.

Since it’s a short and sweet recipe, I thought now would be the perfect time to talk a little about archaeology, and to show you some pictures from past projects I’ve been on. If you’re just here for the recipe, go ahead and scroll down to the bottom of the post – I won’t be offended. 🙂

For those of you who are interested in my “other” job, let’s run through a quick FAQ.

First, What is archaeology? Well, the biggest misconception is that archaeologists dig up dinosaurs. In fact, paleontologists deal with dinosaurs, while archaeologists deal with the human past. Specifically, the material remains left by humans. This includes everything from arrowheads and other stone tools to foundation remnants and broken plates and glasses.

Second, Why do archaeologists do what they do? There are a lot of ways to interpret this question, but here I am getting at the reason my job exists. Because of the Historic Preservation Act of 1966, and specifically Section 106, all federally funded or permitted projects have to undergo a historic and archaeological review to determine the impact that the project will have on any historic sites. That means if federal funds or permits are involved, archaeologists and/or historians have to survey the area to be impacted to determine if there are significant historic or archaeological sites that may be impacted. If there are, the project is either re-routed, or the site is excavated to retrieve any data possible.

So, finally, What do I actually do? The vast majority of the fieldwork that I do involves archaeological survey. In other words, I am out walking across the project area. In plowed fields, we simply look for artifacts that have been brought to the surface by the plowing. In pastures and other where the ground surface isn’t visible, we dig small holes at regular intervals, and pass the dirt through a mesh screen to look for artifacts. When we find artifacts or structure remnants like foundations, we record the site and report it’s location and any information we can gather to the state. If the state determines the site may be significant, we may have to return to do further testing on the site, and perhaps even full excavation, but this is rare. Many sites are not considered significant, that is, they won’t provide us new or important information. And those that are, or may be, or often avoided by the project by a re-route.

Ok. I’m sure I’ve bored you completely by now. 🙂  But now, its time for cookies. These really couldn’t be more simple. It’s a quick and easy dough to put together. Then you divide the dough in half, roll each half into a rectangle, and add sprinkles. Roll it up, chill it, slice it, and bake it. And like I said earlier, if you’re not celebrating Mardi Gras, or want to use the recipe for a different celebration, you can just change up the sprinkles. Think red, white, and blue for July 4th…or red and green for Christmas…or brown, yellow, and orange for the fall…or school colors for graduation. I could go on and on with all the ideas I have for this, but I’m sure you’ve got ideas too, so I’ll just give you the recipe so you can get baking!


Print Recipe
Mardi Gras Cookies
Course Dessert
Servings
cookies
Course Dessert
Servings
cookies
Instructions
  1. Cream butter and sugar with an electric mixer until light and fluffy.
  2. Add egg and vanilla, and mix well.
  3. Add salt and flour, and mix until combined.
  4. Divide dough in half. Place one half onto a lightly floured piece of waxed paper. Dust lightly with flour and cover with another piece of waxed paper. (Or chill until firm enough to roll without sticking to the rolling pin.)
  5. Roll into a 12-inch by 8-inch rectangle, about 1/8-inch thick.
  6. Using one color of sprinkles at a time, coat the dough with a long "stripe" of sprinkles, covering about a third of the rectangle. Repeat with the remaining colors, lined up next to each other.
  7. Roll the dough up tightly, starting from the long end.
  8. Wrap the dough cylinder in the waxed paper and refrigerate 1 hour, or freeze 15-20 minutes.
  9. Repeat with remaining half of dough.
  10. Remove waxed paper, and slice dough into 1/4-inch slices. Place on Silpat or parchment-lined baking sheet.
  11. Bake at 350 degress F for 15-20 minutes or until lightly browned.
  12. Remove from baking sheet to cool completely. Store in airtight container up to one week.
Recipe Notes

Change the sprinkle colors to suit the celebration. For example, red, white, and blue for July 4th. Red and green for Christmas. School colors for a graduation, etc.

Share this Recipe