Archives

Mom’s Zucchini Bread 2.0

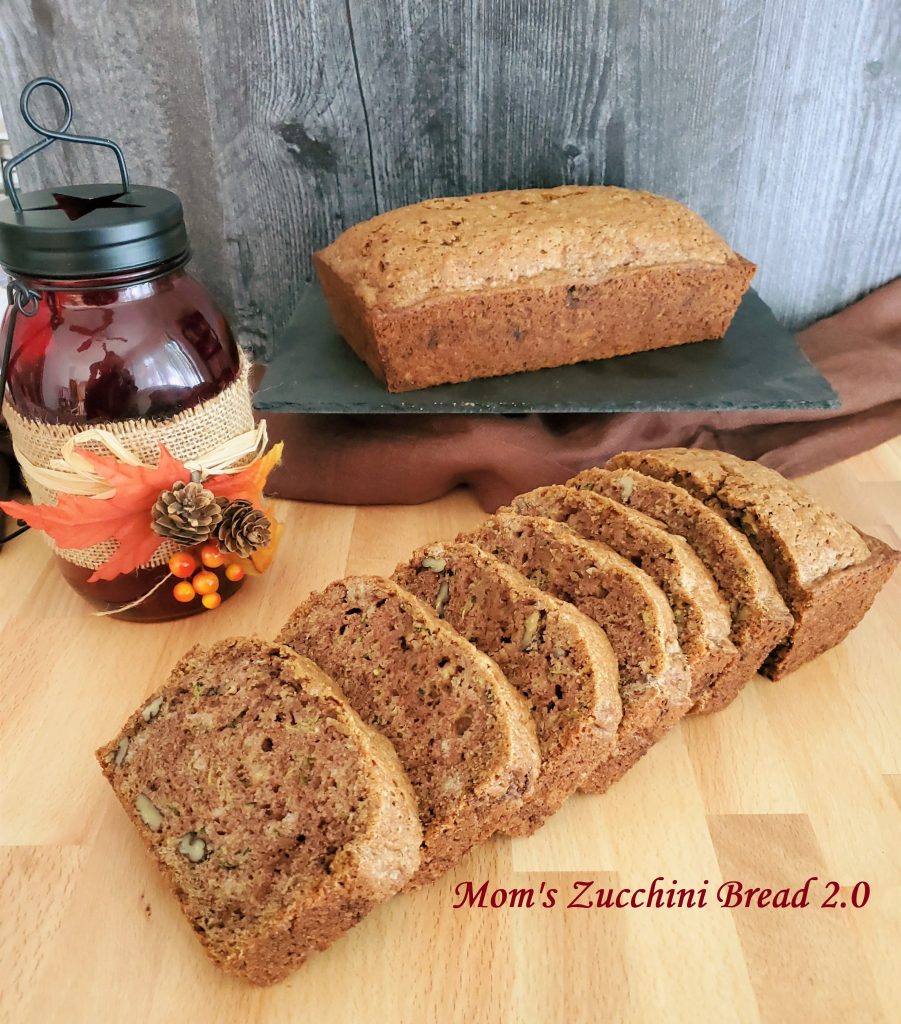
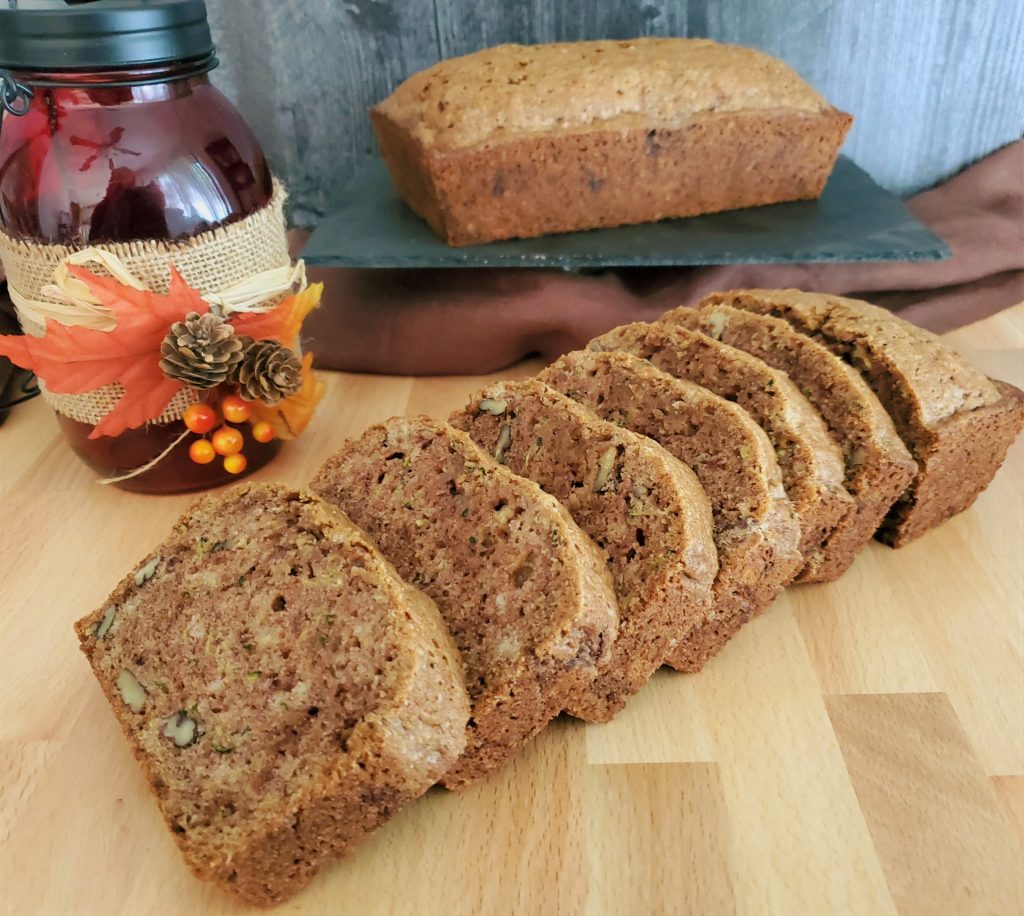
I have the best zucchini bread for you today, ready to use up the last of the fresh zucchini coming in from your gardens and farmer’s markets. I started with a tried and true family favorite, but made some slight adjustments. I think it’s the best zucchini bread out there! It’s still moist and cakey without being dense, and has the best cinnamon flavor without being too sweet. It’s perfect for breakfast, snack time, or even dessert!

Mom's Zucchini Bread 2.0 - The Archaeologist Bakes

As I mentioned, I started with my mom’s recipe that we’ve been using for years. And based on a quick internet search, it seems like a lot of moms and grandmas out there are using the same recipe. And it really was good to begin with, but I wanted to make a few changes.

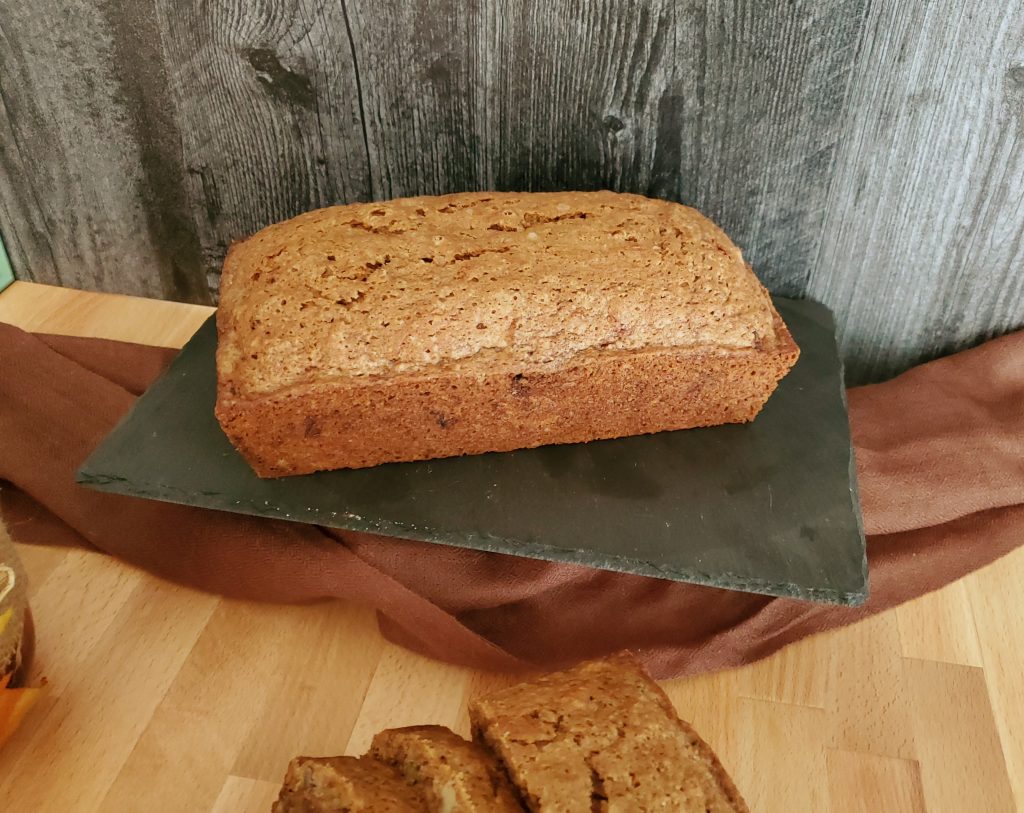
The first problem I encountered with the original recipe was that it was created for 8×4-inch loaf pans. All of my loaf pans are 9×5-inch, and I bet a lot of you have the same size. This meant the loaves (each batch makes two) were pretty flat and sad-looking. But it was too much batter for just one 9×5-inch loaf. So I upped the quantities and now you get two perfectly sized loaves. If you are using 8×4-inch pans, you’ll just get three loaves instead.

Mom's Zucchini Bread 2.0 - The Archaeologist Bakes

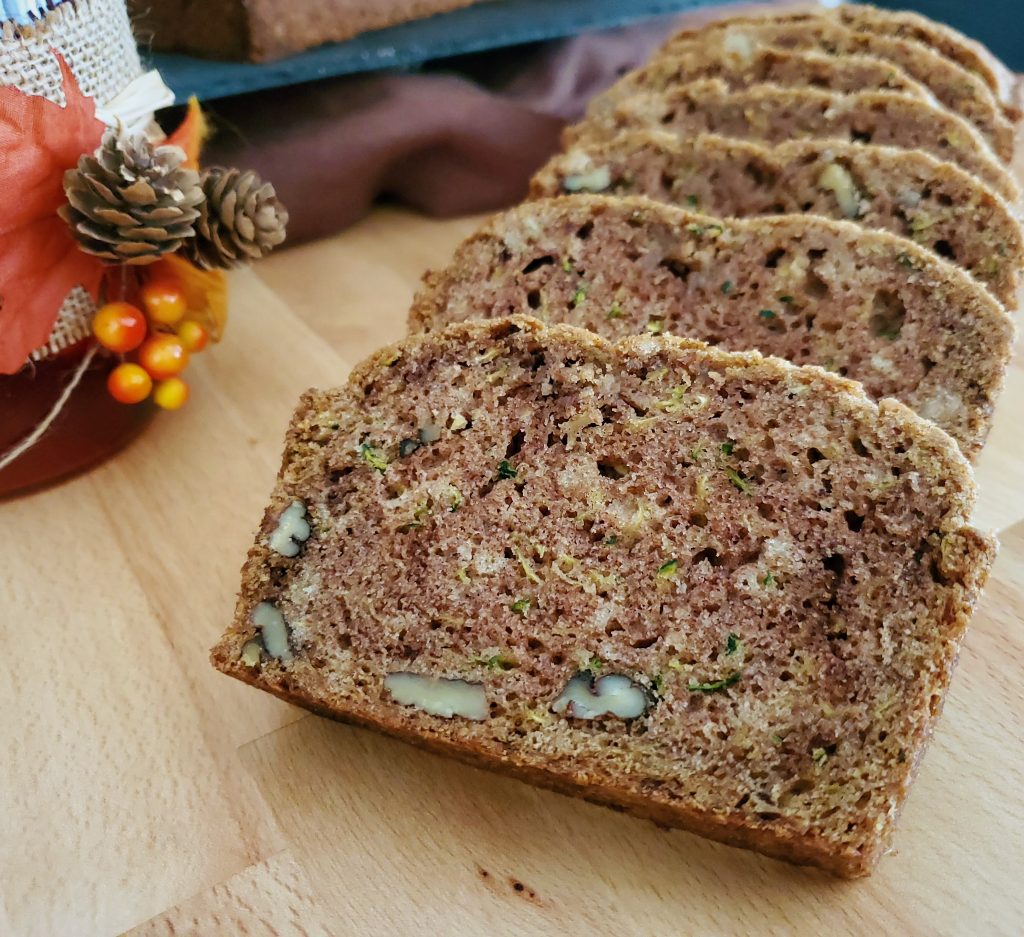
The next problem was that while I love a nice, moist, cakey quick bread, most of the zucchini breads I have tried tend to be a little dense and almost wet. I took a page out of some other recipes I had seen, and decided to squeeze out some of the moisture from the zucchini before adding it to the batter. It doesn’t have to be squeezed completely dry, but removing about 1/4 to 1/3 cup of liquid from it helps a lot with the texture of the finished bread.

Because I was removing some of the bitter liquid, and because I sometimes find zucchini bread to be on the sweet side, I also reduced the sugar a bit. It’s still sweet, but it has a nice balance with the other flavors. And while I just use cinnamon, you could easily substitute the spices of your choice. Use apple pie or pumpkin pie spice, or make a blend of your favorite spices (I’m thinking cinnamon, cloves, and cardamom next time).

Mom's Zucchini Bread 2.0 - The Archaeologist Bakes

I add nuts to my zucchini bread, pecans and walnuts to be specific, but as with almost every recipe, those are optional. Use whatever nut or seed you like – pumpkin or sunflower seeds would be great! Just avoid any that are salted for this recipe. Or, make it even more decadent and add chocolate chips, whatever flavor you prefer! You can even leave the add-ins out entirely.

Whatever mix-ins or spices you choose, I hope you give this recipe a try. It is seriously the best zucchini bread I’ve ever eaten, and I think you’ll love it too!

Mom's Zucchini Bread 2.0 - The Archaeologist Bakes
Print Recipe
Mom's Zucchini Bread 2.0
Servings
loaves
Ingredients
Servings
loaves
Ingredients
Instructions
  1. Place grated zucchini in a clean tea towel and squeeze out excess moisture. It doesn't have to be completely dry, but give it a good squeeze to eliminate the excess liquid. You should remove 1/4 to 1/3 cup. Set zucchini aside.
  2. Combine eggs, oil, sugar, and vanilla in a large mixing bowl. Whisk together until well combined.
  3. Add zucchini and stir until incorporated.
  4. Add all dry ingredients except nuts and stir just until there are no streaks of flour remaining.
  5. Stir in nuts.
  6. Pour into two greased 9x5-inch loaf pans. Bake at 325 degrees F for 60 to 70 minutes or until a toothpick inserted near the center has a few moist crumbs attached.
  7. Cool in pans for 10 minutes before removing to wire rack to cool completely.
  8. Store in an airtight container at room temperature for up to 5 days, or freeze, well-wrapped, for up to 3 months.
Recipe Notes
  • Use three pans if you have 8x4-inch loaf pans. It's ok to bake two and keep the remining batter refrigerated until you can wash and re-use one of the pans.
  • As always, nuts are optional. Use any unsalted variety you like, or substitute with seeds or chocolate chips. 
  • Instead of cinnamon use apple pie or pumpkin pie spice. Or create your own spice blend. Just use the same total amount -  1 1/2 tablespoons.
Share this Recipe

Key Lime Pie Crumble Bars

These Key Lime Pie Crumble Bars taste just like your favorite Key Lime Pie, but are much more portable. They’re perfect for cookouts and backyard barbecues, or just because you’ve got extra limes sitting around waiting to be used up. They are rich, but refreshing because of the lime flavor. You’re definitely going to want to make these this summer!

Key Lime Pie Crumble Bars - The Archaeologist Bakes

I love Key Lime Pie, but I don’t love making it, storing it, and serving it. I wanted something with the same flavors, but easier to make and easier to serve. These crumble bars are the perfect answer. And because I really like a tart lime, I use regular (or Persian) limes. But feel free to use Key Limes if you prefer. They tend to be a little sweeter, so you won’t have quite as tart of a filling, although this one is fairly sweet to begin with.

Key Lime Pie Crumble Bars - The Archaeologist Bakes

As always, there are options if you want to change this up. As with most citrus desserts, feel free to change up the citrus fruit depending on your tastes and what you have on hand. Because the filling depends on the acid from the citrus juice essentially jelling the sweetened condensed milk, it may be a little softer set if you use orange juice, which tends to be a little less acidic. You can help that by adding in a bit of lemon juice with the orange to raise the acidity. And, as usual, feel free to add some finely chopped nuts of your choice to the crust, or even sprinkled on top before baking. Although I didn’t do it, you can certainly add a few drops of food coloring to match the citrus you are using. The filling stays pretty cream-colored without, which I am totally fine with. But everyone loves the look of a green Key Lime Pie, so color it if you prefer, or if you want it to be more obvious what the flavor is.

I used regular Biscoff cookie butter, to help mimic the flavor of a graham cracker crust, but if you have other cookie butters you want to try, go for it! Prefer a gingersnap crust on your citrus pie? Just add in 1/4 to 1/2 teaspoon of ground ginger to your crust mixture. If you don’t have any cookie butter, go get some! Or , use a neutral-flavored nut or seed butter instead. I would use almond or sunflower (unsalted), but I would stay away from peanut butter just because of the stronger flavor. You can also add 1/4 to 1/2 teaspoon of ground cinnamon, especially if you don’t use the Biscoff cookie butter. That will also help mimic the graham cracker taste.

While these are portable because they are a bar, they should still be stored refrigerated. While they can sit at room temperature for a short time, they should be kept cool, so stick them in a cooler if you’re taking them to a picnic. You won’t have to worry about how to get them home, because they are sure to disappear fast! These are such a great twist on the classic pie. I hope you try it soon!

Print Recipe
Key Lime Pie Crumble Bars
Servings
Ingredients
Crust
Filling
Servings
Ingredients
Crust
Filling
Instructions
  1. Combine flour, oats, both sugars, baking soda, baking powder, and salt in a mixing bowl and stir until combined.
  2. Cut butter into mixture until it resembles coarse crumbs.
  3. Stir in egg and cookie butter. Mixture will still be somewhat crumbly.
  4. Press half of mixture into a greased 8" square pan, and bake at 350 degrees for 15 minutes.
  5. While crust is baking, combine all filling ingredients.
  6. Pour filling onto hot crust, and crumble remaining crust mixture over top.
  7. Bake an additional 20-25 minutes or until top is lightly browned.
  8. Cool to room temperature, then refrigerate at least 30 minutes before cutting and serving. Store leftovers in the refrigerator.
Recipe Notes
  • Use any citrus you like instead of lime. If using orange, add a tablespoon of lemon juice to increase the acidity and help the filling set.
  • Use any cookie butter you would like.
  • If you don't have cookie butter, use a neutral nut or seed butter instead. Consider adding a 1/4 to 1/2 teaspoon of cinnamon to help replicate the graham cracker taste.
  • If you like a gingersnap crust on your key lime pie, add 1/4 to 1/2 teaspoon of ground ginger to the crust mixture.
  • Add a few drops of food coloring to the filling if you'd like.
  • Add up to 1/2 cup of finely chopped nuts to the crust, or sprinkle 1/4 cup on top.
Share this Recipe

Raspberry White Chocolate Chip Blondies

The Archaeologist Bakes - Raspberry White Chocolate Chip Blondies

I love a good brownie as much as anyone, but especially this time of year it’s nice to mix it up with something that tastes a little lighter, like these blondies! Full of raspberries and white chocolate chips, they are also buttery and chewy and really the perfect type of blondie. And while I said they taste lighter because of the raspberry and white chocolate, trust me, they are still extremely decadent.

I’ve been making version of these blondies for years, but I’ve never shared them here. Now is the time. I admit that blondies aren’t my favorite dessert, and I’m really not a fan of white chocolate. But these blondies are just so rich and fudgy, while the raspberry really pops and the white chocolate seems to round it all out. Every time I make these I wonder why I don’t make them more often.

The Archaeologist Bakes - Raspberry White Chocolate Chip Blondies

I frequently add slivered almonds to these. Sometimes in addition to the white chocolate chips, and sometimes instead of them. But there are endless ways to customize them. As always, you can add any nut you want, or substitute any flavor chip you would like (bonus points if you use the confetti white chocolate chips like I did). Regular, old semi-sweet chocolate chips would be fantastic. Blackberries, strawberries, and blueberries would all work well. Or use a mix of whatever you have! You can also always leave out the almond extract. The zest of half a lemon would be a great addition instead!

The Archaeologist Bakes - Raspberry White Chocolate Chip Blondies

Don’t do what I do and wait too long to make these. They are so perfect for spring, when you’re craving fresh berry flavors, but it still gets cool at night so a decadent dessert sounds good. Make them this weekend (and then maybe next weekend too)!

Print Recipe
Raspberry White Chocolate Chip Blondies
Course Dessert
Servings
Ingredients
Course Dessert
Servings
Ingredients
Instructions
  1. Line an 8-inch square pan with parchment paper or aluminum foil and spray with non-stick cooking spray.
  2. Combine melted butter and brown sugar. Stir in egg, vanilla, and almond extract.
  3. Stir in flour, baking powder, and salt.
  4. Add white chocolate chips, mix well, and scrape into prepared pan. Smooth the top.
  5. Slightly chop the berries. Scatter them over the batter in the pan.
  6. Bake at 350 degrees F for 35-45 minutes. Blondies should be golden brown and set in the center. A toothpick inserted near the center should come out with only a few wet crumbs.
  7. Cool completely before removing from pan and slicing.
Recipe Notes
  • Leave out almond extract, or substitute with the zest of half a lemon.
  • Use semi-sweet or other chocolate chips instead of white chocolate.
  • Use up to 1 cup of mix-ins. Instead of all chocolate chips, use 1/2 cups nuts and 1/2 cup chips.
  • Try different berries - strawberries, blackberries, and blueberries would all be great.
Share this Recipe

Summer Sunshine Coffee Cake

I have the perfect summer weekend breakfast treat for you today! Made from homemade biscuits and full of bright citrus flavors, it also makes a great afternoon pick-me-up, or even a light dessert. And it’s easy to make and comes together fairly quickly, making it great for last-minute or unplanned guests.

I got the inspiration from Paula Deen’s Orange Coffee Cake, but I wanted to make it a little more homemade. Instead of canned biscuits, I decided to make homemade angel biscuits, which are essentially a yeasted buttermilk biscuit. They are a little flaky and a little bread-y, and I think they are perfect in this application.

I also wanted to update the flavor slightly. I’m personally not a huge fan of orange flavor, but I thought mixing it with grapefruit would be a nice twist. I really like the combination in this cake. The two flavors complement each other well, without either being overwhelmed by the other. And the citrus really brightens up a cake that could otherwise feel heavy and rich. I finished if off with a cream cheese glaze, flavored lightly with grapefruit juice, since I thought that would be a little more subtle than orange, but you could use either one.

You could definitely change up the flavor with whatever citrus you love, or have on hand. I personally love limes, and think that would make a great cake. Blood oranges would make a fantastic winter cake. And can you ever go wrong with Meyer lemons? Use just a single fruit, or mix a few together to find your perfect cake.

I really hope you give this recipe a try. If you’re intimidated by yeast dough this is a perfect place to start, since there isn’t a ton of kneading. And if you really don’t want to use yeast or wait the short rise time, you can use your favorite biscuit recipe and follow the rest of the directions with that dough. However you make it, I know you’ll love it!

Print Recipe
Summer Sunshine Coffee Cake
Servings
people
Ingredients
Biscuits
Filling and Topping
Icing
Servings
people
Ingredients
Biscuits
Filling and Topping
Icing
Instructions
  1. Combine yeast, warm water, and 2 teaspoons sugar in a small bowl and set aside.
  2. In a large bowl, combine flour, baking powder, baking soda, and salt. Grate cold butter into flour mixture (see recipe notes for tips), and toss gently to combine well and coat all pieces with flour.
  3. Stir in yeast mixture, sour cream, and milk and mix well. Dump onto a lightly floured surface and knead gently until mixture is smooth and all flour is fully incorporated.
  4. Place into a greased bowl, cover, and let rise in a warm place until doubled in size, approximately 30-45 minutes.
  5. While dough is rising, combine 1/2 cup sugar with orange and grapefruit zests and mix well. Melt 1 tablespoon of butter and set aside.
  6. Once dough has risen, lightly punch down and place on a lightly floured surface. Roll out to 1/2-inch thickness. Sprinkle with half of sugar and zest, then fold dough in half.
  7. Roll again lightly to 3/4-inch thickness. Cut out biscuits with 3-inch round cutter, pressing straight down without twisting. Try to get as many out of the first roll as possible. Ideally you should get 7 to 8 biscuits with the first roll. Lightly press together any scraps and cut additional biscuits. You should have 9 in total.
  8. Place one whole biscuit, one from the second batch of cutting, into the center of a greased 9-inch pie plate or cake pan. Cut remaining 8 biscuits in half with a sharp knife, creating half circles. Place the 16 pieces around the center biscuit, slightly overlapping and with all cut sides facing the same way, like flower petals.
  9. Brush the top of the biscuits with the melted butter, and sprinkle with the remaining sugar and zest mixture.
  10. Bake at 375 degrees Fahrenheit for 18-22 minutes or until golden brown.
  11. While coffee cake is cooling, make icing. Whisk together the cream cheese and powdered sugar. Add enough juice to make a thick icing that is just thin enough to be drizzled. Drizzle over cooled cake.
Recipe Notes
  • When grating butter into flour mixture, use full stick (8 tablespoons). Unwrap most of the way, and while holding the wrapped end, grate in 7 tablespoons. Save remaining tablespoon for topping.
  • Use any combination, or single flavor, of citrus zest and juice.
Share this Recipe

Lemon Meringue Ice Cream Cake

With all of the hot weather we’re currently having, I’ve been craving ice cream and bright citrus flavors. And this Lemon Meringue Ice Cream Cake perfectly fits the bill! It’s a tart lemon sorbet surrounded by layers of creamy lemon ice cream, all topped with whipped cream. And the best part is that it’s all no-churn so anyone can make it!

I know layered desserts can look intimidating, but I assure you, this recipe couldn’t be any easier. Yes, it takes a little time since you have to chill each layer, but most of that time is hand’s off.

The middle layer is a no-churn lemon sorbet. It’s so simple and uses only a handful of basic ingredients. Please, please, please use fresh lemons. Not only so you can add the peel, which adds a ton of flavor without the tartness, but because bottled lemon juice is just not the same. I made my sorbet very tart, since I love strong citrus flavor, but you can increase the sugar to 3/4 cup if you prefer your lemon desserts to be a little sweeter. Just heat the water, sugar, salt, and peel until the sugar is dissolved. Add the lemon juice, cool, and strain. Add in a tablespoon of vodka if you’d like, which is just a little extra insurance to keep it from freezing quite so firm. If you don’t have it or don’t want to use it, it will still be great. I also added a few drops of food coloring just because I wanted a bright yellow color. Then freeze until mostly solid. Blitz it up in a food processor or blender, and freeze again until solid. Easy!

The lemon ice cream is even easier, if that’s possible. It’s a basic no-churn ice cream (heavy cream and sweetened condensed milk) with the addition of lemon juice and zest. Stir together the lemon juice, lemon zest, and sweetened condensed milk. Whip the cream, and fold in the sweetened condensed milk mixture and you have an ice cream base ready to freeze. This recipe makes a half batch of ice cream, which means you have half a can of sweetened condensed milk left. You can double the recipe to use a full can and freeze half of the ice cream in its own container if you prefer.

I topped mine with homemade sweetened whipped cream (heavy cream and powdered sugar), but you could also use Cool Whip. Or for a true lemon meringue pie feel, go ahead and top it with meringue (and torch it if you like!). Yes, you can freeze leftovers with meringue or whipped cream on top.

And don’t confine yourself to lemon. You can substitute any citrus in equal parts for the lemon. I personally love lime and can’t wait to try a lime version. Grapefruit or orange would be super refreshing. Or try mixing flavors! How about lime sorbet with lemon ice cream? Or orange sorbet with vanilla ice cream (just leave out the citrus and add vanilla extract to the ice cream base). I’m sure blood oranges would make a stunning dessert when they are in season as well.

Don’t let the layers intimidate you. It may look fancy, but truly anyone can make it. It uses basic pantry ingredients and no fancy equipment. Give this one a try, you are sure to impress guests with this one!

Print Recipe
Lemon Meringue Ice Cream Cake
Servings
slices
Ingredients
Sorbet
Ice Cream
Servings
slices
Ingredients
Sorbet
Ice Cream
Instructions
  1. Combine water, sugar, and salt in a small saucepan. Use a vegetable peeler to remove large strips of peel from the lemons, leaving the white pith on the lemon. Add peel to the saucepan and heat over medium heat until just beginning to bubble and sugar is completely dissolved.
  2. Remove from heat, add lemon juice, and vodka and food coloring if using, and set aside to cool for 10 minutes.
  3. Pour through a strainer into a freezer-safe container and freeze until nearly solid, 3 to 4 hours.
  4. While sorbet is freezing, make the ice cream base. Stir together sweetened condensed milk, lemon zest, and lemon juice.
  5. Whip the cream until stiff peaks form. Fold in the sweetened condensed milk mixture.
  6. Line a 9"x 5" loaf pan with waxed paper, leaving a portion overhanging. I left the short ends un-lined.
  7. Pour half of the ice cream base into the loaf pan and smooth out. Cover and place loaf pan in the freezer and freeze until firm, about 3 to 4 hours. Store the remaining ice cream base in the refrigerator, tightly covered.
  8. Once sorbet is nearly frozen, break into chunks and place in blender or food processor. Blitz until slushy. If ice cream layer is firm, pour slushy sorbet mix directly on top, cover, and freeze until firm, 1 to 2 hours. If ice cream base is not yet set, place sorbet mix back into a separate container and return to freezer until ready to use.
  9. Once sorbet layer is firm, pour on remaining ice cream mixture, cover, and freeze until firm, 3 to 4 hours or overnight.
  10. To remove from pan, run a knife along the edges that aren't lined with waxed paper. Pull ice cream out of pan with overhanging paper. If it won't come loose, dip pan in 1 to 2 inches of hot water for just a few seconds. Invert ice cream onto a serving platter.
  11. Top with sweetened whipped cream, Cool Whip, or even meringue. Torch meringue if desired. Store leftovers in the freezer, covered, even with whipped cream or meringue.
Recipe Notes
  • Use any citrus fruit you'd like.
  • Mix flavors - use one flavor for the sorbet and another for the ice cream.
Share this Recipe

Maple Mousse

It’s finally fall! I’m so excited – cool evenings and cooler days, crops are being harvested (no more walking through 10-foot-tall corn!), and all the mouthwatering flavors that come with this time of year.

I grew up in northeast Ohio where there is a festival every spring dedicated to maple, since that’s when it’s produced. It has always been a favorite flavor around our house any time of year. But most people, myself included, consider it to be a fall flavor. Maybe that’s because it goes so well with other fall and winter flavors like the warm spices, tart cranberries, and roasted nuts that are so prevalent during this season.

Whatever the time of year, this recipe is delicious. It is a very light mousse with a strong maple flavor. It’s perfect for the holiday season when there is so much heavy food around, but it would also be wonderful as a light dessert in the spring or summer. You can serve the mousse in bowls as I did, or use it fill cannoli shells or cream puffs. I added some fun fall sprinkles, but chopped or candied walnuts would also work well.

This mousse does involve a little cooling time, but it is generally very simple. You start by making a maple custard, which is good all on it’s own. It has to chill completely before you add in the whipped cream. The mousse ends up being very light and slightly loose in texture. If you prefer a firmer mousse, use a stabilized whipped cream that is made with gelatin. Maple syrup is a must – no substituting pancake syrup!

This recipe serves four, but doubles very well, which makes it great for entertaining. Although it is best served within a few hours, the custard can be made a day ahead. Just whip the cream and fold in right before serving and top as desired. I hope you give it a try soon!


Print Recipe


Maple Mousse

Servings


Ingredients

Servings


Ingredients


Instructions
  1. Heat syrup and 3/4 cup milk in a saucepan over medium heat until simmering.

  2. Combine cornstarch, salt, and remaining milk. Add to simmering syrup mixture, stirring constantly.

  3. Cook over medium-high heat, stirring constantly, until mixture is thickened and begins to bubble.

  4. Reduce heat to medium; cook and stir 2 minutes.

  5. Beat egg in a small bowl. Add in a small amount of the hot mixture and stir well.

  6. Add egg mixture to pan and cook, stirring constantly, until mixture simmers. It will be thick.

  7. Continue to cook and stir for 2 additional minutes.

  8. Pour into a heat-proof bowl. Cover with plastic wrap or waxed paper, making sure wrap touches the surface of the custard to prevent a skin, and refrigerate until cool, 4 hours or overnight.

  9. When custard is cool, whip cream until stiff peaks form.

  10. Gently fold into cooled custard, then transfer to serving bowls. Top as desired and serve.


Recipe Notes
  • Candied or roasted walnuts would be a great addition to the top of this mousse.
  • Use mousse as a filling for cannoli or cream puffs.
  • For a firmer mousse, use a stabilized whipped cream (with gelatin).
  • Best eaten within a few hours.


Share this Recipe

Slow Cooker Meatballs and Rice

Hi everyone! I have something a little different for you today. I know I normally bring you baked goods, but everyone needs quick and easy dinner recipes, and I have one for you today. This was one of my favorite meals growing up – a sort of sweet and sour meatball served over rice. It’s definitely not  your standard Italian or Swedish meatball recipe, but it is really delicious. And kids love them!

You start by making pretty basic beef meatballs. Then you cook them in the sauce – no browning ahead of time needed. The sauce is really simple – just four ingredients (plus water) that you probably have in your pantry.  Ketchup, mustard, flour, and sugar. Four simple ingredients, but together they are more than the sum of their parts.

My mom always cooked these in a casserole dish in the oven, but I converted it to a slow cooker recipe. She thinks her aunt, who gave her the recipe, often made them in a slow cooker as well. Use whichever method works best for you and your schedule.

Although I haven’t strayed too far from the original recipe, I feel confident you could use your favorite meatball recipe with this sauce. Just don’t cook the meatballs ahead of time. I would probably skip on highly flavored recipes like sausage-based ones, but I think this would be a great place to substitute ground turkey or chicken. Since the meatballs cook in the sauce, there is less chance they will end up dry.

We always ate these meatballs over minute rice, but any type of rice or other starch would work well. You definitely want something to help soak up that sauce. Add in a vegetable, and you’ve got a quick, easy weeknight meal!

Print Recipe
Slow Cooker Meatballs and Rice
Course Main Dish
Servings
people
Ingredients
Meatballs
Sauce
Course Main Dish
Servings
people
Ingredients
Meatballs
Sauce
Instructions
  1. Combine all meatball ingredients until well mixed.
  2. Form into slightly-larger-than golf ball sized balls. I use a regular size ice cream scoop to keep them even. Place into slow cooker (or casserole dish).
  3. Combine all sauce ingredients and whisk until sugar is dissolved and flour in incorporated.
  4. Pour sauce over meatballs. Add water if needed to just cover meatballs.
  5. In slow cooker, cook on low for 6 to 8 hours or on high for 3 to 4 hours. In the oven, cook for about 1 hour at 350 degrees F.
  6. Serve over rice.
Recipe Notes
  • Recipe can be doubled (or tripled if you have a big enough pan.
  • Serve over the starch of your choice.
  • Feel free to experiment with other meat choices - turkey, chicken, etc.
Share this Recipe

Peanut Butter Crumb Topped Banana Bread

It’s almost time for school to start, and I have a great recipe for quick breakfasts or lunchbox treats. Peanut Butter Crumb Topped Banana Bread is a perfect mix of peanutty crumb topping and sweet banana bread.

I have been seeing so many variations on banana bread lately – crumb topped (cinnamon, graham cracker, cookie butter, and more), stuffed with cream cheese, filled with chocolate chips, or swirled with peanut butter. They all sound so good. But then I saw a recipe for peanut butter crumb-topped brownies, and I decided that the two had to meet.

Although I love walnuts or pecans in banana bread, I left them out this time. You could absolutely add them back in – or use chopped peanuts for an extra peanut bite. Chocolate chips, peanut butter chips, even butterscotch or caramel chips would be a welcome addition. You can also substitute the nut or seed butter of your choice in the crumb topping as well.

Did I mention this recipe makes two loaves? That’s right – one for right now (I ate half a loaf warm from the oven so be warned!), and one for the freezer for those hectic weekdays. I love eating a slice bread of this for breakfast, but it makes a great snack as well. Pack it in a lunchbox or serve a slice after school. This is going to become your favorite banana bread!

Print Recipe
Peanut Butter Crumb Topped Banana Bread
Servings
loaves
Ingredients
Peanut Butter Crumb Topping
Banana Bread
Servings
loaves
Ingredients
Peanut Butter Crumb Topping
Banana Bread
Instructions
Peanut Butter Crumb Topping
  1. Melt peanut butter and butter together.
  2. Stir in remaining ingredients and set aside.
Banana Bread
  1. Combine butter and slightly chopped, or broken, bananas in a microwave safe bowl or large saucepan. Heat over low heat, or 30 seconds at a time in the microwave. Stir and mash with a large spoon or potato masher until butter is melted and bananas are soft and mashed.
  2. Remove from heat. Stir in sugar and salt. Add eggs, milk, and vanilla and mix well.
  3. Stir in flour and baking powder just until combined.
  4. Gently stir in any mix-ins, if using.
  5. Divide evenly between two greased 9"x5" loaf pans.
  6. Divide peanut butter mixture in half, and crumble evenly over batter in pans.
  7. Bake at 350-degrees F for 40-45 minutes, or until toothpick inserted in the middle comes out clean
  8. Cool 10 minutes before turning out of pan onto cooling rack to cool completely.
  9. To freeze, wrap well in plastic wrap and foil, and place in a zip-top freezer. Freeze for up to a month.
Recipe Notes
  • Add chopped peanuts to up the peanut butter flavor.
  • Use pecans or walnuts for a more traditional banana bread.
  • Use any flavor chips - chocolate, peanut butter, butterscotch, caramel, etc.
  • Substitute any nut or seed butter for the peanut butter in the crumb topping.
Share this Recipe

Black and White Banana Cupcakes

I have the perfect Fourth of July recipe for you today! It’s a delicious banana cupcake dipped in chocolate and vanilla fudge frostings. It’s a great dessert to bring to a cookout for several reasons. First, the recipe makes 24 cupcakes, so there’s plenty to go around. Second, the frostings set up firm so they’re easy to transport and they won’t melt easily in the heat if you’ve got them sitting outside. And finally, well, they’re just plain delicious!

These cupcakes are one of my favorites. Well, let me clarify. The cupcakes are delicious. The frostings are out of this world, and probably the reason I like the cupcakes so much. I am a chocolate person through and through. I never choose vanilla if chocolate is an option. Except with this frosting. This vanilla frosting is almost like a vanilla fudge. It is so good, it will almost make you forget there is chocolate available too. Almost. So, I could never choose between a vanilla frosted and chocolate frosted one. Until now. I figured if New York could frost their cookies with both vanilla and chocolate, well, I could do it to my cupcakes. Yep, it’s a good idea.

Let’s start by talking about the cupcakes. Really, these aren’t much different than banana bread. They’re a little bit lighter in texture, which is perfect for a summer cupcake. The banana flavor is there but not overwhelming, and the bananas help to keep the cupcakes moist. Nuts are completely optional, but I do enjoy walnuts or pecans in these. I think hazelnuts or macadamias would also be great. Or, if you prefer to throw in some mini chocolate chips, I won’t stop you. They’re your cupcakes – do what sounds good to you!

Now, the frostings. Yes, plural. But I promise they aren’t difficult. Both are rich and fudgy, and they both go so well with the banana cupcake. To frost them, if you only want one flavor on the cupcake, you can just dip the tops into the warm frosting. To get the half and half look, I found it easier to use a spoon or spatula to spread partially cooled frosting on half a cupcake and then repeat on the other half with the other flavor. If you want sprinkles (and who doesn’t want sprinkles?), you need to be fast with them. This frosting sets fairly quickly, so I wouldn’t frost more than one or two cupcakes before topping with sprinkles. It’s a great task for any little helpers you have!

Each frosting recipe makes enough to fully frost 12 cupcakes, so one recipe of each flavor will cover 24, either 12 of each or half and half on 24. Of course, if you don’t need to transport these or want to change them up, you can absolutely use a standard buttercream. Chocolate, vanilla…..peanut butter, anyone? And you could replace the sprinkles with chopped nuts, mini chocolate chips, or chopped candies. 

These cupcakes are sure to become a favorite. Bake up a batch for your next picnic or bake sale. And if you have leftovers, well, they’re basically banana bread…so I say eat them for breakfast!

Print Recipe
Black and White Banana Cupcakes
A light banana cupcake with chocolate and vanilla fudge frostings.
Course Dessert
Servings
cupcakes
Ingredients
Cupcakes
Chocolate Frosting
Vanilla Frosting
Course Dessert
Servings
cupcakes
Ingredients
Cupcakes
Chocolate Frosting
Vanilla Frosting
Instructions
Cupcakes
  1. Cream butter and sugar. Add eggs and vanilla and mix well,
  2. Stir in mashed bananas.
  3. Combine dry ingredients, except nuts. in a separate bowl.
  4. Add half of dry ingredients to banana mixture, mix, and add sour milk. Mix well and add remainder of dry ingredients.
  5. Stir in nuts if using.
  6. Line 24 muffin cups with paper liners and fill about 2/3 full.
  7. Bake at 350 degrees F for 20-25 minutes until golden brown and the centers spring back when touched.
  8. Remove cupcakes to wire racks to cool.
Chocolate Frosting
  1. Combine chocolate, butter, and milk in the top of a double boiler and heat until melted.
  2. Turn off heat, but leave the double boiler together. Stir in powdered sugar. Frosting should be thick but pourable.
Vanilla Frosting
  1. Combine butter, milk, and salt in the top of a double boiler and heat until melted.
  2. Turn off heat but leave double boiler together. Stir in vanilla extract and powdered sugar. Frosting should be thick but pourable.
Assembly
  1. While frosting is still pourable, dip the tops of the cupcakes and allow to set on wire racks.
  2. To create half and half cupcakes, let frosting cool slightly and spread cupcakes half with vanilla and half with chocolate frosting.
  3. Frosting sets quickly, so add sprinkles after every one or two cupcakes are frosted.
  4. If frosting begins to cool and set in the bowl, you can reheat gently in the double boiler.
Recipe Notes

Make these your own:

  • Choose your favorite nut to add.
  • Leave out the nuts entirely.
  • Substitute mini chocolate chips instead of nuts.
  • Not in love with chocolate? Double the batch of vanilla frosting and use only that.
  • Family of chocoholics? Double the chocolate frosting and use only that.
  • Instead of sprinkles, use nuts, mini chips, or chopped candies.
  • You can use any flavor of buttercream on these as well - chocolate, vanilla, and peanut butter would be great!
Share this Recipe

Ice Cream Slab Pie

Who’s ready for ice cream? Or better yet, ice cream slab pie! This one has a rice crispy crust, peanut butter fudge sauce, and homemade no-churn ice cream with chocolate chips and peanut butter cups. It’s a twist on a favorite dessert my mom used to make in the summertime.

It sounds like a lot of components, but each of them are so easy. And there are so many options – not only to change up the flavors, but you can easily swap in store-bought parts too. You can make this as homemade or store-bought as you’d like.

Let’s start with the base. My recipe begins with a simple rice crispy base. But you could just as easily bake up a batch of brownies, or use a roll of cookie dough pressed into a pan and baked. Even a graham cracker crust would work.

The sauce starts with a homemade hot fudge that is combined with peanut butter. You could leave out the peanut butter and extra corn syrup (just use the whole batch of hot fudge instead). Or start with a bottled hot fudge sauce. You can also mix up the flavors. Use a caramel or butterscotch sauce instead. Or use a different nut butter, Nutella, or even cookie butter!

The ice cream is a very simple no churn ice cream. I love the no-churn recipe, and it’s endlessly adaptable. Choose the candy mix-ins that you prefer, or use crushed cookies (like Oreo’s!). You could also use a store-bought ice cream in whatever flavor you prefer. Just soften it slightly before you scoop it into the crust.

There are so many variations you can make to this recipe. I hope you give it a try, and let me know what flavors you choose!


Print Recipe
Ice Cream Slab Pie
Course Dessert
Servings
Ingredients
Base
Hot Fudge Sauce
Ice Cream
Course Dessert
Servings
Ingredients
Base
Hot Fudge Sauce
Ice Cream
Instructions
Base
  1. Combine first three ingredients in a large saucepan and bring to a boil over medium heat.
  2. Remove from heat and stir in cereal until completely coated.
  3. Press evenly into a greased 13"x9" baking pan. Line with parchment or waxed paper if preferred for easier serving.
Sauce
  1. Melt chocolate in a small saucepan over low heat.
  2. Once melted, add evaporated milk, sugar, cocoa powder, 1/4 cup corn syrup, salt, and vanilla. Cook over medium-low heat until thickened, about 5 to 8 minutes. The mixture should not quite come to a simmer.
  3. Remove 2/3 cup hot fudge sauce and combine with peanut butter and remaining corn syrup. Save remaining hot fudge sauce for another use (store air tight in refrigerator).
  4. Spread half of peanut butter fudge sauce onto the base and place in freezer.
Ice Cream
  1. Whip cream until soft peaks form.
  2. Gently fold in sweetened condensed milk and vanilla until combined.
  3. Chop 12 of the peanut butter cups and fold into ice cream mixture with all but 2 tablespoons of the chocolate chips.
  4. Spread ice cream mixture onto prepared base and sprinkle with remaining chips and the other 6 peanut butter cups, chopped.
  5. Freeze for at least 6 hours or overnight.
  6. Serve with warmed remaining peanut butter fudge sauce drizzled over each serving.
  7. Store leftovers in the freezer, and extra sauce in the refrigerator.
Recipe Notes
  • Use any crust you'd like - brownies, baked cookie dough, graham cracker crust.  Mix it up with different flavors!
  • Use 2/3 cup bottled hot fudge sauce if desired. Or double the amount and leave out the peanut butter.
  • Use any flavor sauce you'd like - try butterscotch or caramel!
  • Substitute any nut butter, or even Nutella. Cookie butter would be delicious too.
  • Use any mix-ins you prefer - try different candies, or crushed cookies. Your imagination is the limit! Use 1 to 2 cups total.
  • You can also use softened, store bought ice cream in any flavor to fill the crust (6 cups/ 48 oz tub).
Share this Recipe