Archives

Key Lime Pie Crumble Bars

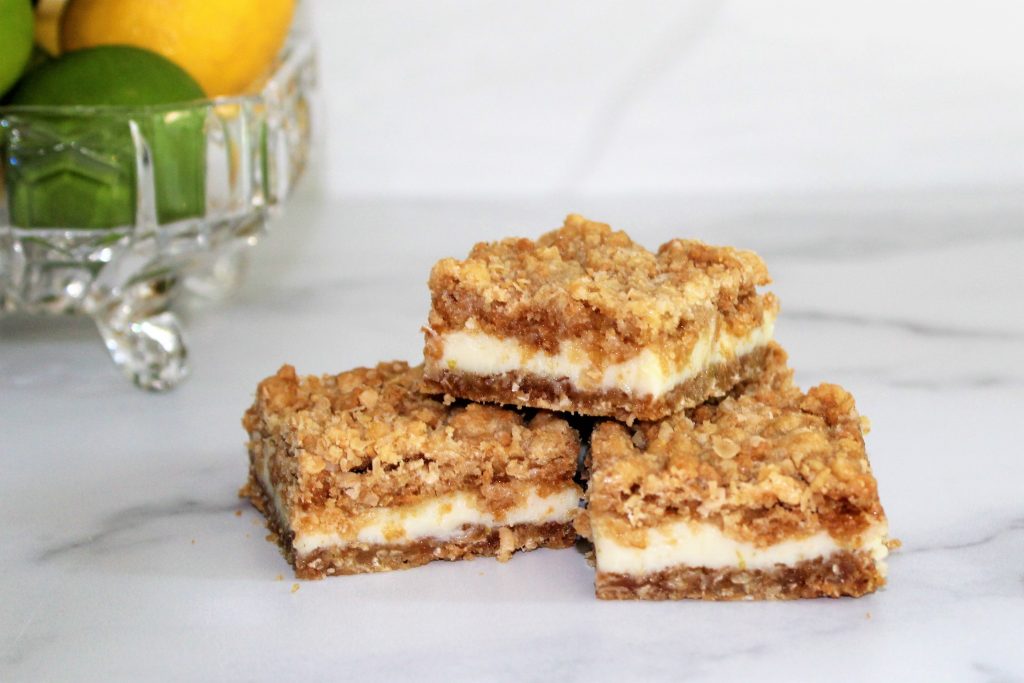
These Key Lime Pie Crumble Bars taste just like your favorite Key Lime Pie, but are much more portable. They’re perfect for cookouts and backyard barbecues, or just because you’ve got extra limes sitting around waiting to be used up. They are rich, but refreshing because of the lime flavor. You’re definitely going to want to make these this summer!

Key Lime Pie Crumble Bars - The Archaeologist Bakes

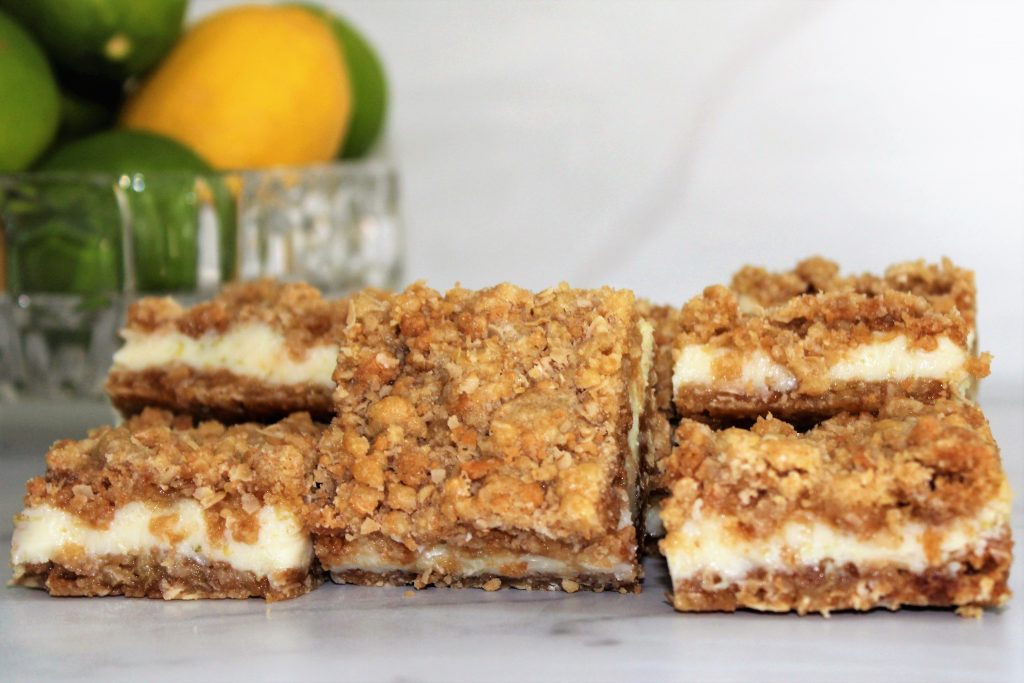
I love Key Lime Pie, but I don’t love making it, storing it, and serving it. I wanted something with the same flavors, but easier to make and easier to serve. These crumble bars are the perfect answer. And because I really like a tart lime, I use regular (or Persian) limes. But feel free to use Key Limes if you prefer. They tend to be a little sweeter, so you won’t have quite as tart of a filling, although this one is fairly sweet to begin with.

Key Lime Pie Crumble Bars - The Archaeologist Bakes

As always, there are options if you want to change this up. As with most citrus desserts, feel free to change up the citrus fruit depending on your tastes and what you have on hand. Because the filling depends on the acid from the citrus juice essentially jelling the sweetened condensed milk, it may be a little softer set if you use orange juice, which tends to be a little less acidic. You can help that by adding in a bit of lemon juice with the orange to raise the acidity. And, as usual, feel free to add some finely chopped nuts of your choice to the crust, or even sprinkled on top before baking. Although I didn’t do it, you can certainly add a few drops of food coloring to match the citrus you are using. The filling stays pretty cream-colored without, which I am totally fine with. But everyone loves the look of a green Key Lime Pie, so color it if you prefer, or if you want it to be more obvious what the flavor is.

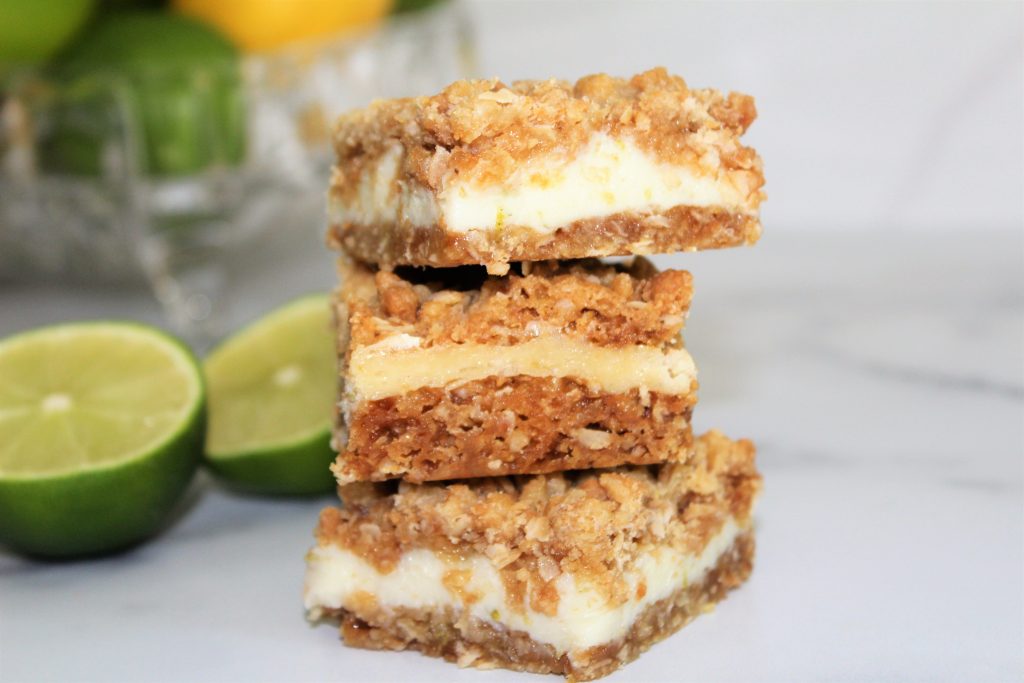
I used regular Biscoff cookie butter, to help mimic the flavor of a graham cracker crust, but if you have other cookie butters you want to try, go for it! Prefer a gingersnap crust on your citrus pie? Just add in 1/4 to 1/2 teaspoon of ground ginger to your crust mixture. If you don’t have any cookie butter, go get some! Or , use a neutral-flavored nut or seed butter instead. I would use almond or sunflower (unsalted), but I would stay away from peanut butter just because of the stronger flavor. You can also add 1/4 to 1/2 teaspoon of ground cinnamon, especially if you don’t use the Biscoff cookie butter. That will also help mimic the graham cracker taste.

While these are portable because they are a bar, they should still be stored refrigerated. While they can sit at room temperature for a short time, they should be kept cool, so stick them in a cooler if you’re taking them to a picnic. You won’t have to worry about how to get them home, because they are sure to disappear fast! These are such a great twist on the classic pie. I hope you try it soon!

Print Recipe
Key Lime Pie Crumble Bars
Servings
Ingredients
Crust
Filling
Servings
Ingredients
Crust
Filling
Instructions
  1. Combine flour, oats, both sugars, baking soda, baking powder, and salt in a mixing bowl and stir until combined.
  2. Cut butter into mixture until it resembles coarse crumbs.
  3. Stir in egg and cookie butter. Mixture will still be somewhat crumbly.
  4. Press half of mixture into a greased 8" square pan, and bake at 350 degrees for 15 minutes.
  5. While crust is baking, combine all filling ingredients.
  6. Pour filling onto hot crust, and crumble remaining crust mixture over top.
  7. Bake an additional 20-25 minutes or until top is lightly browned.
  8. Cool to room temperature, then refrigerate at least 30 minutes before cutting and serving. Store leftovers in the refrigerator.
Recipe Notes
  • Use any citrus you like instead of lime. If using orange, add a tablespoon of lemon juice to increase the acidity and help the filling set.
  • Use any cookie butter you would like.
  • If you don't have cookie butter, use a neutral nut or seed butter instead. Consider adding a 1/4 to 1/2 teaspoon of cinnamon to help replicate the graham cracker taste.
  • If you like a gingersnap crust on your key lime pie, add 1/4 to 1/2 teaspoon of ground ginger to the crust mixture.
  • Add a few drops of food coloring to the filling if you'd like.
  • Add up to 1/2 cup of finely chopped nuts to the crust, or sprinkle 1/4 cup on top.
Share this Recipe

Lemon Meringue Ice Cream Cake

With all of the hot weather we’re currently having, I’ve been craving ice cream and bright citrus flavors. And this Lemon Meringue Ice Cream Cake perfectly fits the bill! It’s a tart lemon sorbet surrounded by layers of creamy lemon ice cream, all topped with whipped cream. And the best part is that it’s all no-churn so anyone can make it!

I know layered desserts can look intimidating, but I assure you, this recipe couldn’t be any easier. Yes, it takes a little time since you have to chill each layer, but most of that time is hand’s off.

The middle layer is a no-churn lemon sorbet. It’s so simple and uses only a handful of basic ingredients. Please, please, please use fresh lemons. Not only so you can add the peel, which adds a ton of flavor without the tartness, but because bottled lemon juice is just not the same. I made my sorbet very tart, since I love strong citrus flavor, but you can increase the sugar to 3/4 cup if you prefer your lemon desserts to be a little sweeter. Just heat the water, sugar, salt, and peel until the sugar is dissolved. Add the lemon juice, cool, and strain. Add in a tablespoon of vodka if you’d like, which is just a little extra insurance to keep it from freezing quite so firm. If you don’t have it or don’t want to use it, it will still be great. I also added a few drops of food coloring just because I wanted a bright yellow color. Then freeze until mostly solid. Blitz it up in a food processor or blender, and freeze again until solid. Easy!

The lemon ice cream is even easier, if that’s possible. It’s a basic no-churn ice cream (heavy cream and sweetened condensed milk) with the addition of lemon juice and zest. Stir together the lemon juice, lemon zest, and sweetened condensed milk. Whip the cream, and fold in the sweetened condensed milk mixture and you have an ice cream base ready to freeze. This recipe makes a half batch of ice cream, which means you have half a can of sweetened condensed milk left. You can double the recipe to use a full can and freeze half of the ice cream in its own container if you prefer.

I topped mine with homemade sweetened whipped cream (heavy cream and powdered sugar), but you could also use Cool Whip. Or for a true lemon meringue pie feel, go ahead and top it with meringue (and torch it if you like!). Yes, you can freeze leftovers with meringue or whipped cream on top.

And don’t confine yourself to lemon. You can substitute any citrus in equal parts for the lemon. I personally love lime and can’t wait to try a lime version. Grapefruit or orange would be super refreshing. Or try mixing flavors! How about lime sorbet with lemon ice cream? Or orange sorbet with vanilla ice cream (just leave out the citrus and add vanilla extract to the ice cream base). I’m sure blood oranges would make a stunning dessert when they are in season as well.

Don’t let the layers intimidate you. It may look fancy, but truly anyone can make it. It uses basic pantry ingredients and no fancy equipment. Give this one a try, you are sure to impress guests with this one!

Print Recipe
Lemon Meringue Ice Cream Cake
Servings
slices
Ingredients
Sorbet
Ice Cream
Servings
slices
Ingredients
Sorbet
Ice Cream
Instructions
  1. Combine water, sugar, and salt in a small saucepan. Use a vegetable peeler to remove large strips of peel from the lemons, leaving the white pith on the lemon. Add peel to the saucepan and heat over medium heat until just beginning to bubble and sugar is completely dissolved.
  2. Remove from heat, add lemon juice, and vodka and food coloring if using, and set aside to cool for 10 minutes.
  3. Pour through a strainer into a freezer-safe container and freeze until nearly solid, 3 to 4 hours.
  4. While sorbet is freezing, make the ice cream base. Stir together sweetened condensed milk, lemon zest, and lemon juice.
  5. Whip the cream until stiff peaks form. Fold in the sweetened condensed milk mixture.
  6. Line a 9"x 5" loaf pan with waxed paper, leaving a portion overhanging. I left the short ends un-lined.
  7. Pour half of the ice cream base into the loaf pan and smooth out. Cover and place loaf pan in the freezer and freeze until firm, about 3 to 4 hours. Store the remaining ice cream base in the refrigerator, tightly covered.
  8. Once sorbet is nearly frozen, break into chunks and place in blender or food processor. Blitz until slushy. If ice cream layer is firm, pour slushy sorbet mix directly on top, cover, and freeze until firm, 1 to 2 hours. If ice cream base is not yet set, place sorbet mix back into a separate container and return to freezer until ready to use.
  9. Once sorbet layer is firm, pour on remaining ice cream mixture, cover, and freeze until firm, 3 to 4 hours or overnight.
  10. To remove from pan, run a knife along the edges that aren't lined with waxed paper. Pull ice cream out of pan with overhanging paper. If it won't come loose, dip pan in 1 to 2 inches of hot water for just a few seconds. Invert ice cream onto a serving platter.
  11. Top with sweetened whipped cream, Cool Whip, or even meringue. Torch meringue if desired. Store leftovers in the freezer, covered, even with whipped cream or meringue.
Recipe Notes
  • Use any citrus fruit you'd like.
  • Mix flavors - use one flavor for the sorbet and another for the ice cream.
Share this Recipe

Ice Cream Slab Pie

Who’s ready for ice cream? Or better yet, ice cream slab pie! This one has a rice crispy crust, peanut butter fudge sauce, and homemade no-churn ice cream with chocolate chips and peanut butter cups. It’s a twist on a favorite dessert my mom used to make in the summertime.

It sounds like a lot of components, but each of them are so easy. And there are so many options – not only to change up the flavors, but you can easily swap in store-bought parts too. You can make this as homemade or store-bought as you’d like.

Let’s start with the base. My recipe begins with a simple rice crispy base. But you could just as easily bake up a batch of brownies, or use a roll of cookie dough pressed into a pan and baked. Even a graham cracker crust would work.

The sauce starts with a homemade hot fudge that is combined with peanut butter. You could leave out the peanut butter and extra corn syrup (just use the whole batch of hot fudge instead). Or start with a bottled hot fudge sauce. You can also mix up the flavors. Use a caramel or butterscotch sauce instead. Or use a different nut butter, Nutella, or even cookie butter!

The ice cream is a very simple no churn ice cream. I love the no-churn recipe, and it’s endlessly adaptable. Choose the candy mix-ins that you prefer, or use crushed cookies (like Oreo’s!). You could also use a store-bought ice cream in whatever flavor you prefer. Just soften it slightly before you scoop it into the crust.

There are so many variations you can make to this recipe. I hope you give it a try, and let me know what flavors you choose!


Print Recipe


Ice Cream Slab Pie

Course Dessert

Servings


Ingredients
Base

Hot Fudge Sauce

Ice Cream

Course Dessert

Servings


Ingredients
Base

Hot Fudge Sauce

Ice Cream


Instructions
Base
  1. Combine first three ingredients in a large saucepan and bring to a boil over medium heat.

  2. Remove from heat and stir in cereal until completely coated.

  3. Press evenly into a greased 13"x9" baking pan. Line with parchment or waxed paper if preferred for easier serving.

Sauce
  1. Melt chocolate in a small saucepan over low heat.

  2. Once melted, add evaporated milk, sugar, cocoa powder, 1/4 cup corn syrup, salt, and vanilla. Cook over medium-low heat until thickened, about 5 to 8 minutes. The mixture should not quite come to a simmer.

  3. Remove 2/3 cup hot fudge sauce and combine with peanut butter and remaining corn syrup. Save remaining hot fudge sauce for another use (store air tight in refrigerator).

  4. Spread half of peanut butter fudge sauce onto the base and place in freezer.

Ice Cream
  1. Whip cream until soft peaks form.

  2. Gently fold in sweetened condensed milk and vanilla until combined.

  3. Chop 12 of the peanut butter cups and fold into ice cream mixture with all but 2 tablespoons of the chocolate chips.

  4. Spread ice cream mixture onto prepared base and sprinkle with remaining chips and the other 6 peanut butter cups, chopped.

  5. Freeze for at least 6 hours or overnight.

  6. Serve with warmed remaining peanut butter fudge sauce drizzled over each serving.

  7. Store leftovers in the freezer, and extra sauce in the refrigerator.


Recipe Notes
  • Use any crust you'd like - brownies, baked cookie dough, graham cracker crust.  Mix it up with different flavors!
  • Use 2/3 cup bottled hot fudge sauce if desired. Or double the amount and leave out the peanut butter.
  • Use any flavor sauce you'd like - try butterscotch or caramel!
  • Substitute any nut butter, or even Nutella. Cookie butter would be delicious too.
  • Use any mix-ins you prefer - try different candies, or crushed cookies. Your imagination is the limit! Use 1 to 2 cups total.
  • You can also use softened, store bought ice cream in any flavor to fill the crust (6 cups/ 48 oz tub).


Share this Recipe

Cherry Chocolate Chip No-Churn Ice Cream

Is it warm enough for ice cream where you live? It’s been warm off and on here, but the truth is we will eat ice cream all year long. 🙂

Do you remember the cherry curd I made? I mentioned at the time that you could swirl it into ice cream, and that’s exactly what I did with it! I have made a few no-churn ice creams over the years, and I have to say that I love them. I have an ice cream maker as well, and have made traditional ice cream too, but I really do love the simplicity and texture of the no-churn varieties.

It only takes a few ingredients for the base, and it is endlessly customizable. And there is no chill time, then churn time, then freezer time like traditional ice cream. You mix the ingredients together and stick it in the freezer for a few hours to harden. That’s it. Homemade ice cream in six hours or so. You really can’t beat that!

So the base starts with just a can of sweetened condensed milk and heavy cream. Whip the cream to firm peaks and fold it into the condensed milk. For vanilla ice cream, just add some vanilla extract or vanilla bean paste. Or go crazy with your add-ins. Choose any other extract that sounds good to you. Stir in nuts or chocolate pieces, or drizzle in fudge sauce or caramel. Or do like I did and fold in cherry, or any fruit, curd. You can stir in some cocoa powder to the sweetened condensed milk before adding the whipped cream. I made one that called for a melting peanut butter into the condensed milk before adding the whipped cream.

For this particular recipe, I folded about a cup of the cherry curd into the base along with about a half cup of mini chocolate chips. I prefer the mini chips in ice cream because they aren’t as hard to eat when frozen as a larger chip is. I stirred the curd almost completely into the base, but you can leave it as streaky as you’d like. Place the mix into a freezer-safe container, and add a drizzle of curd to the top. Cover tightly and freeze for four to six hours, or until the ice cream is hard.

This no-churn ice cream is so smooth and creamy, I really do prefer it to regular ice cream any more. And it’s so easy to make, there really is no excuse not to try it! 


Print Recipe
Cherry Chocolate Chip No-Churn Ice Cream
Course Dessert
Servings
Course Dessert
Servings
Instructions
  1. Beat the heavy cream with an electric mixer until firm peaks form.
  2. Fold the whipped cream into the condensed milk until almost fully combined.
  3. Fold in the cherry curd and chocolate chips until well distributed or fully incorporated, depending on your preference.
  4. Place into a freezer-safe container and freeze for 4 to 6 hours, or until ice cream is firm.
Recipe Notes

Variations:

Add 2 teaspoons of vanilla or any other extract to the sweetened condensed milk before folding in the whipped cream.

Stir in any nuts or candies of your choice (about 1 to 1 1/2 cups total) after folding in whipped cream.

Melt 2/3 cup peanut butter and mix into the condensed milk before folding in the whipped cream.

Add 1/2 to 3/4 cup cocoa powder to the condensed milk before folding in the whipped cream.

Share this Recipe