Archives

Lemon Puff Balls

Today I’m bringing you a recipe that is a twist on a childhood favorite of mine – chocolate puff balls. I’ll share that recipe with you soon, but since I just posted a chocolate recipe , I decided to mix things up a bit.

Are you still dealing with winter where you are? Spring seems to have sprung here, much to my dismay. I definitely miss the cold, snowy winters of Cleveland. The spring weather here is finally convincing me to bake things a little less heavy and rich. I have tossed around the idea of lemon puff balls for some time, and this weekend I finally tackled them.

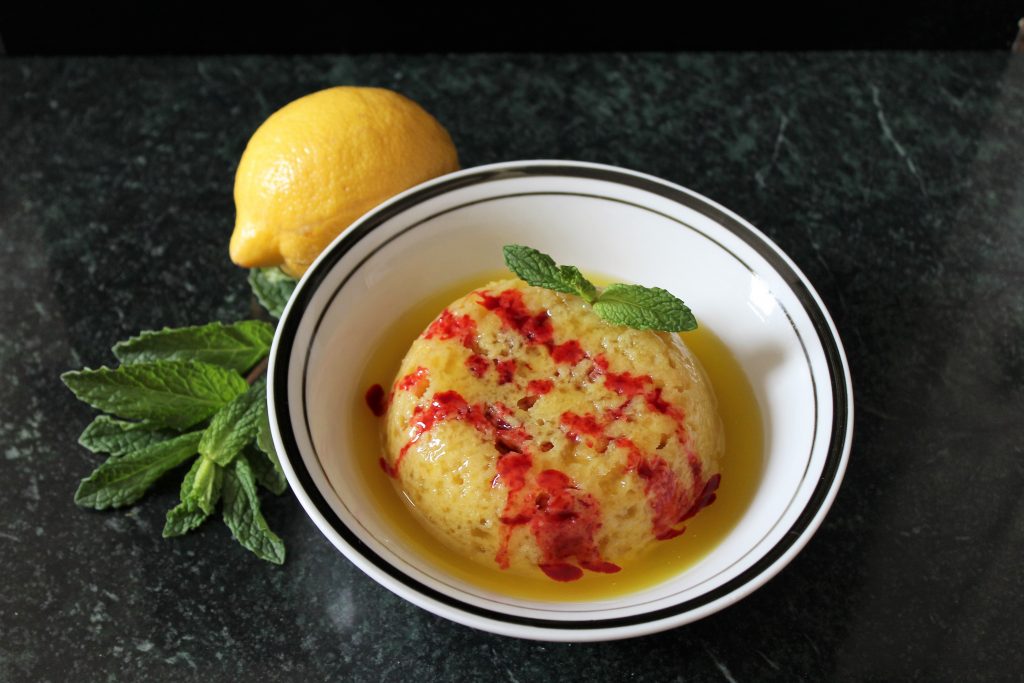
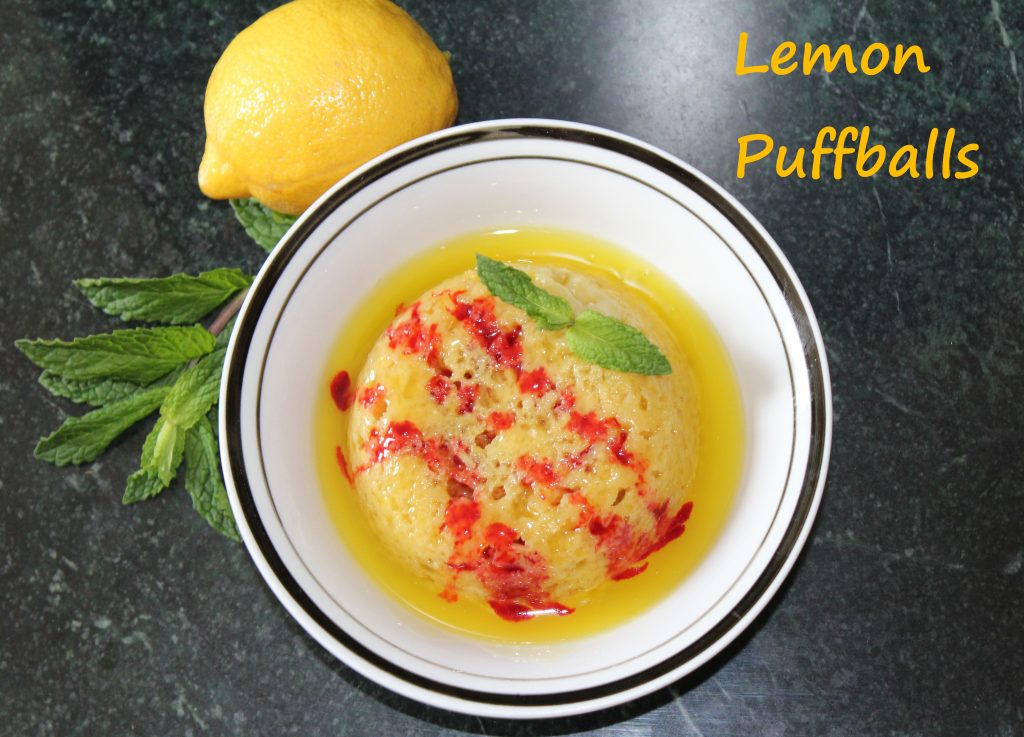
So what is a puffball? It’s nothing mysterious, really. Just a steamed cake, usually served with a warm sauce instead of frosting. The original recipe is a chocolate cake with a vanilla butter sauce. This time, I’ve made a lemon cake with a lemon sauce. I added a drizzle of raspberry sauce as well, but that’s completely optional.

You really could do this with any variety of citrus. And feel free to use a sauce of your choice, or just a dusting a powdered sugar and a dollop of whipped cream. Chocolate sauce would be great on an orange cake. Or you could just use extra milk in place of the lemon juice (and remove the baking soda) for a vanilla cake and top with citrus sauce or hot fudge.

This is a great recipe for beginner bakers. It is a simple, one-bowl cake recipe that doesn’t require an electric mixer.  However, you do need some ramekins or Pyrex bowls and a steamer. I use four 10-oz Pyrex bowls, but you can use up to six bowls or ramekins, as small as a 5-oz size. Just make sure they are heat-safe. I have large pasta pot with a steamer insert that I use, but you can use any steamer you have, or make your own with a large soup or stock pot.

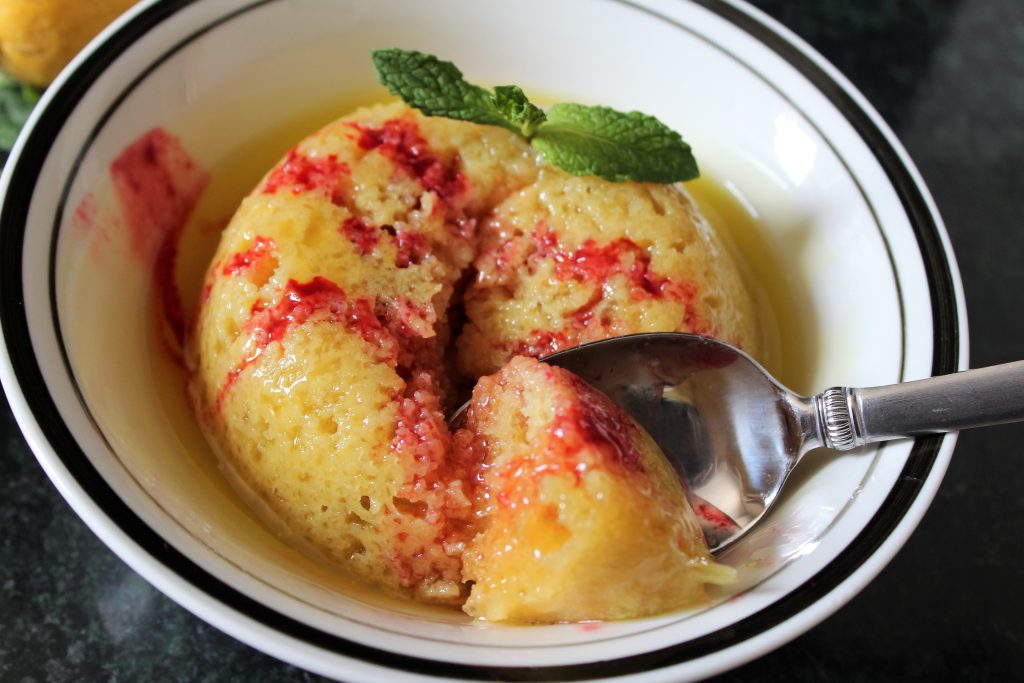
The cake is fairly light, in both flavor and texture. Which is why I highly recommend adding the sauce to it. The sauce soaks up into the cake to make it extra moist and flavorful. If you’ve never had a puff ball cake before, you definitely need to give these a try. 


Print Recipe
Lemon Puff Balls
Servings
Ingredients
Puff Balls
Lemon Sauce
Servings
Ingredients
Puff Balls
Lemon Sauce
Instructions
Puff Balls
  1. Combine all ingredients in a medium bowl and wisk until combined.
  2. Pour into 4 to 6 greased ramekins or Pyrex bowls (5 to 10 oz each).
  3. Steam cakes in a steamer for 20-30 minutes or until a toothpick inserted in the middle comes out clean.
Lemon Sauce
  1. Combine sugar, cornstarch, and water in a small saucepan and cook over medium heat until thickened and clear.
  2. Add remaining ingredients and stir until butter is melted.
  3. Serve warm over puff balls.
Recipe Notes

A drizzle of raspberry sauce adds a nice pop to the lemon cake.

Use any citrus you'd like for both the cake and the sauce. Or omit the citrus sauce and top with warm hot fudge sauce on an orange puff ball.

You can also top with whipped cream or ice cream.

Share this Recipe

Pumpkin Spice Ghost Munch Caramel Corn

Hi guys! Are you over the pumpkin spice craze yet, or do you have room for more? I hope you’re still into it, but if not, it’s super easy to leave it out of this recipe. In fact, this is super customizable. You can really make it for any holiday or special occasion. But more on that in a minute.

Do you all know what Moose Munch is? It’s a caramel corn by Harry and David that is typically coated in chocolate. It is delicious. This is my take on it, all dressed up for Halloween. And it’s super easy, even with homemade caramel corn. Yes, I said homemade. I promise it’s not hard to make, and you probably have all of the ingredients you need in your pantry right now. Yes, you need a candy thermometer, but they aren’t expensive and it is sooooo worth it.

I love this caramel corn. My mom has been making it for as long as I can remember. She always adds salted peanuts, which I think add the perfect salty component. You can, of course, use whatever nuts you like. But make sure they are salted and roasted. If you don’t use salted nuts, give the caramel corn a heavy sprinkle of sea salt before baking. You’ll thank me later. You can certainly stop once the caramel corn is made, and you would have an absolutely delicous snack. But if you want something special for a holiday or party, or just because, go ahead and add some chocolate. I used chocolate almond bark and pumpkin spice chips, but you can use any chocolate that sounds good to you. Chocolate chips, white chocolate, almond bark, peanut butter chips. Like I said, anything you want.

Candy melts also work well, so it’s super simple to customize the colors. Go for red and green at Christmas. Or red, white, and blue for the Fourth of July. How about some pretty pastels for Easter? Or use your teams colors for a fun tailgating snack. And the sprinkles are optional, but there are so many fun varieties out there, you are sure to find some that will work for whatever event you’re making this for. Put out a big bowl for everyone to much on and it will be gone in no time. Or divide it into individual bags with matching ribbons or tags for a fun party favor. However you decide to customize this, you should definitely give it a try!


Print Recipe
Pumpkin Spice Ghost Munch Caramel Corn
Homemade caramel corn coated in chocolate.
Servings
Ingredients
Servings
Ingredients
Instructions
  1. Pop popcorn. You can do this in an air popper, a stir popper, in a pan on the stove, or even in the microwave. You can use a small amount of butter or oil, but you don't wanted seasoned or salted popcorn. You will need 10 cups of popped popcorn.
  2. Combine butter, brown sugar, and corn syrup in a medium to large saucepan and cook over medium to medium-high heat.
  3. Cook and stir until butter is melted and mixture begins to boil. Insert candy thermometer and continue to cook for about 5 minutes, without stirring, until mixture reaches 248 degrees, or firm ball stage.
  4. Remove from heat and carefully stir in the baking soda. The mixture will foam up, which is why you want a larger saucepan than you think you need.
  5. While caramel is cooking, combine popcorn and nuts (if using) in a large greased baking pan. I'm talking about a sheet pan, preferably with 2-inch sides. If you don't have a pan this big, the bottom part of a large broiler pan may work. Or divide evenly between two 13x9-inch cake pans.
  6. Pour caramel mixture (after baking soda has been added) over the popcorn and nuts. Stir well to coat all pieces. If you do not want to use nuts, sprinkle the coated popcorn with 1/4 to 1/2 teaspoon sea salt.
  7. Move to a 250-degree F oven and cook for 45-60 minutes, stirring every 15 minutes. The caramel corn is done when no "loose" caramel is pooling in the bottom of the pan. Everything should be coated onto the popcorn and it shouldn't be too sticky. It will firm up the rest of the way once cooled.
  8. Once caramel corn is cool, melt the chocolate in a large bowl. Toss with 6 cups of the caramel corn until completely coated. Spread onto parchment- or waxed paper-lined baking sheet and let harden. I placed mine in the fridge for a few minutes to help it set.
  9. If using more than one type of chocolate, like I did, melt each type separately. I used 1/2 cup each of pumpkin spice chips and chopped chocolate almond bark. I mixed each type with 3 cups of the caramel corn.
  10. If you want to add sprinkles, add them to the chocolate-coated popcorn before it sets,
  11. Combine coated caramel corn with uncoated and mix well to distribute. Store in an airtight container for up to a week.
Recipe Notes
  • You can use any type of chocolate or chips that you want. Dark, milk, white, peanut butter. Colored candy melts also work great and make it easy to customize for any holiday or event.
  • Try red and green for Christmas; red, white, and blue for Fourth of July; team colors for tailgating; school colors for graduation.
Share this Recipe

Apple Cider Cookies for the Go Bo! Bake Sale

If you follow me on Facebook, you may have seen recently that I signed up to donate decorated cookies for the Go Bo! Bake Sale. For the whole story, go check out that link. In short, a 12 year-old boy (Bo) was diagnosed with a rare form of leukemia. While fighting cancer, he started the Go Bo! Foundation to fund cancer research and childhood treatment. The year he passed, a bake sale was planned as a fundraiser for the foundation. A local cookier took to social media to spread the word about the bake sale and ask any other cookiers to donate decorated cookies. That was in 2012, and they raised $5,000 at that bake sale. As word has spread, more and more cookiers have donated. Last year they were able to raise over $30,000!

When I heard about the fundraiser, I knew I wanted to decorate some cookies to donate. I pored over cookie after cookie on Pinterest, and finally settled on a design. It was a hybrid of a few others I had seen out there, and I have to say I really love the way they came out. I made royal icing transfer and then attached them to the flooded cookies. Here are the images I used as templates.

After I knew what design I wanted to create, I had to decide what flavor to make. I love my basic butter cookie recipe, but I wanted something a little more special. So I thought about the apple cider shortbread I had made at Christmas last year. I knew I could combine that idea with my favorite butter cookie, so that’s what I did. Most of the flavor comes from instant hot cider mix, but I felt like it needed another punch of apple flavor, so I reduced some apple cider down to a syrup and mixed that in as well. It was exactly what I was looking for! I think these will be making a reappearance at Christmas this year!

There aren’t a lot of easy substitutions for this recipe. But you could brown the butter and then cool and solidify it before creaming with the sugar. Or, use maple syrup instead of the cider syrup for a hint of maple. And, I suspect you could use instant (sweetened) ice tea mix instead of the cider mix (leaving out the reduced cider syrup) for a summery version of this cookie. In fact, I may try that next summer!

Print Recipe
Apple Cider Cookies
Servings
Ingredients
Servings
Ingredients
Instructions
  1. Place apple cider into a saucepan. Bring to boil over medium heat and cook until it is reduced to 2 tablespoons. Set aside to cool.
  2. Cream butter with sugar and hot cider mix.
  3. Beat in egg, vanilla, and cooled reduced cider.
  4. MIx in salt and flour until well blended.
  5. Depending on how warm your butter was, you may need to chill the dough for up to an hour to make rolling easier.
  6. Roll out dough on a lightly floured surface to nearly 1/4 inch thickness, and cut out with desired cookie cutter.
  7. Place on ungreased cookie sheet and bake at 350 degrees F for 15 to 20 minutes. Cookies should be lightly browned around the edges.
  8. Cool on cookie sheets for 5 minutes before moving to a rack to cool completely.
  9. Decorate as desired. You can also decorate with sprinkles before baking.
Recipe Notes
  • Use parchment or silicon mats on the cookie sheets if desired.
  • Roll thinner if a crisper cookie is desired.
  • Use maple syrup in place of the reduced cider for a slight variation.
  • Omit the reduced cider and replace the hot cider mix with sweetened ice tea mix for a summery cookie.
Share this Recipe

Coffee Chocolate Chip Oatmeal Cookies

I know what you’re thinking. You’re thinking you don’t need another chocolate chip cookie recipe. But you’re wrong. Because not only is this cookie delicious and different than most of your chocolate chip cookie recipes, this one doesn’t have to be a chocolate chip cookie.

This recipe is based off of a recipe we made all the time as kids. We always had homemade cookies in our school lunch. Always. (My mom is the best. 🙂 ). The oatmeal chocolate chips cookies were a regular and a favorite. I was thinking about them the other day, and I thought they might be improved with a bit of coffee. (I was right). I made a few other changes (took out one egg white, used all brown sugar, melted the butter) to make them even chewier. Also a good idea.

But as I said, these don’t have to be chocolate chip cookies. In fact, the original recipe called for either chocolate chips OR shredded coconut. You could absolutely make that substitution here. Or add chopped nuts. Or dried fruit (you know, like raisins, if you’re in to that kind of thing). Or any combination of the above. The coffee is not an overwhelming flavor, but it really does add an interesting element to the cookie. Yes, you can leave it out. Or, if you want a real coffee punch, use up to twice the amount I’ve called for.

One thing you shouldn’t do is skip the chilling the dough step. Especially when using the melted butter, you really need to chill the dough to get a thicker, chewy cookie. Unless you want a thinner, crispier cookie. In which case, you should bake these as soon as they are mixed. (But seriously, why would you want that??) Whatever way you make these, you should definitely make them soon. I was informed that these are “husband approved”, and that I didn’t need to bring these in to the office to share. (Sorry guys!) 🙂

Print Recipe
Coffee Chocolate Chip Oatmeal Cookies
Course Dessert
Servings
cookies
Ingredients
Course Dessert
Servings
cookies
Ingredients
Instructions
  1. Combine melted butter and brown sugar and mix well.
  2. Add egg, egg yolk, coffee (dissolved in water), and vanilla and mix until combined.
  3. Add dry ingredients, mixing just until combined.
  4. Stir in chocolate chips or other mix-ins.
  5. Refrigerate dough at least 30 minutes.
  6. Scoop chilled dough by heaping tablespoons onto cookie sheets.
  7. Bake at 350 degrees F for 12 to 15 minutes or until golden brown and just set. Do not overbake.
  8. Cool completely on wire rack. Store in airtight container up to a week.
Recipe Notes
  • Use any flavor chips you like.
  • Substitute chopped nuts, shredded coconut, and/or dried fruit.
  • Use any combination that sounds good to you!
Share this Recipe
 

Unicorn Pizzelles Three Ways: Cookies, Sandwiches, and Stroopwafels

Hi everyone! Is it too late to jump on the unicorn bandwagon? 

What a busy spring it has been. I was out of town for work most of the last month, and when I finally got back I had this small matter of my wedding to attend to. 🙂 It turned out to be a beautiful day, at least for the few hours we needed it to be. It stormed the night before and then again that afternoon, but in the late morning it dried up and the sun actually peeked out a little bit. It was a small ceremony, with only the two of us and the pastor (and photographer), but it was perfect, and everything we wanted it to be. I made my own wedding cake – I know, everyone says not to do it – but it turned out great. I made one of the geode cakes that has become so popular lately. Do you want to see a picture?

So, as you can see, I have been busy, and I have been baking. I just haven’t had time to do much for this blog. But I got a pizzelle maker from my parents for the wedding, and I knew I had to do something fun with it. Since I hadn’t made any unicorn treats yet, and they seem to be so popular, I decided it was time. And because I just can’t leave something well enough alone, I made a couple of variations.

Of course the “plain” cookie is delicious, but I also used a circle cutter to cut smaller circles and filled those with white chocolate buttercream. Then I rolled them in sprinkles. Because unicorn cookies need sprinkles. And for the larger cookies, I filled some with a caramel stroopwafel filling. Stroopwafels are a pizzelle-like cookie from the Netherlands filled with a cinnamon caramel. I had never had one, but they sounded delicious – and they are. Apparently you can place it over a steamy mug of coffee or tea, and that will warm the cookie and filling slightly, making it even better.

Pizzelles are so easy to make. Yes, you need a pizzelle iron, but they are totally worth it. They are a really simple batter, and they cook up so fast you can make a ton of cookies pretty quickly. And, they work perfectly with a 1:1 gluten-free flour blend if you are GF.  You can flavor them with any extract you want. And you can fill them with almost anything. They make great ice cream sandwiches. Or curl them into an ice cream cone while they are still warm. Or spread on some peanut butter, or Nutella, or cookie butter….

If you aren’t into unicorns, go with darker colors and make galaxy-inspired cookies. Or, with graduation season upon us, color these with your school colors. They would be great for a graduation party! However you make them, you should make them soon!


Print Recipe
Unicorn Pizzelles Three Ways
Basic pizzelles, with two optional fillings.
Servings
Ingredients
Pizzelles
White Chocolate Buttercream
Stroopwafel Filling
Servings
Ingredients
Pizzelles
White Chocolate Buttercream
Stroopwafel Filling
Instructions
Pizzelles
  1. Beat eggs and sugar with the whisk attachment of an electric mixer until light yellow in color, 3 to 5 minutes.
  2. Add vanilla and cooled, melted butter and mix until combined.
  3. Sift together flour and baking powder, and gently stir into egg mixture.
  4. If desired, divide into three equal portions and color each portion a different color.
  5. Place each color into a small disposable piping bag, cut off the ends, and place all three into a larger piping bag.
  6. Or, using a long spatula, place the three colors side-by-side in the large piping bag.
  7. Preheat and grease a pizzelle iron according to manufacturers directions.
  8. Pipe about 1 to 1 1/2 tablespoons of batter onto each circle and bake 25-35 seconds.
  9. Remove from iron with a spatula and place flat onto a wire rack to cool.
  10. For smaller cookies, use about 1/2 tablespoon batter and cook for 15-20 seconds.
  11. As soon as cookies come off of the iron (you have about 15 seconds tops), use a 2 to 3 inch round metal cookie cutter to cut a circle out of the middle of the cookie. Cool on wire rack as above.
White Chocolate Buttercream
  1. Combine chocolate chips and cream in a microwavable bowl.
  2. Microwave for 1 to 1 1/2 minutes, stirring every 30 seconds, until chips are melted. (You are making a white chocolate ganache.)
  3. Cool ganache to room temperature, either on the counter or in the refrigerator.
  4. Place buttercream into a bowl, and beat in cooled ganache.
  5. Sandwich two small pizzelles together with the white chocolate buttercream, and roll edges in sprinkles if desired.
Stroopwafel Filling
  1. Combine all ingredients in a saucepan and cook over medium heat until mixture reaches the soft ball stage, 234 to 240 degrees Fahrenheit.
  2. Remove from heat and cool slightly, no more than 5 minutes.
  3. Working quickly, and CAREFULLY (it's hot sugar!), spread about 1/2 tablespoon of the mixture on one full-size pizzelle and top with another cookie.
  4. If the mixture gets too thick before you finish filling cookies, place the pan back on the burner on low until the mixture starts to thin back out.
Recipe Notes
  • Use any extract you like. Anise is a traditional flavor for pizzelles.
  • Use any colors you like, or leave it uncolored and drop by spoonfuls instead of piping the batter.
  • Fill the cookies (or not) with any filling you like. Ice cream, buttercream, Nutella, etc.
Share this Recipe